The blow guide will help you manage your database settings.
If you experience any issues while setting up your database, contact us here to help solve them.
My database settings
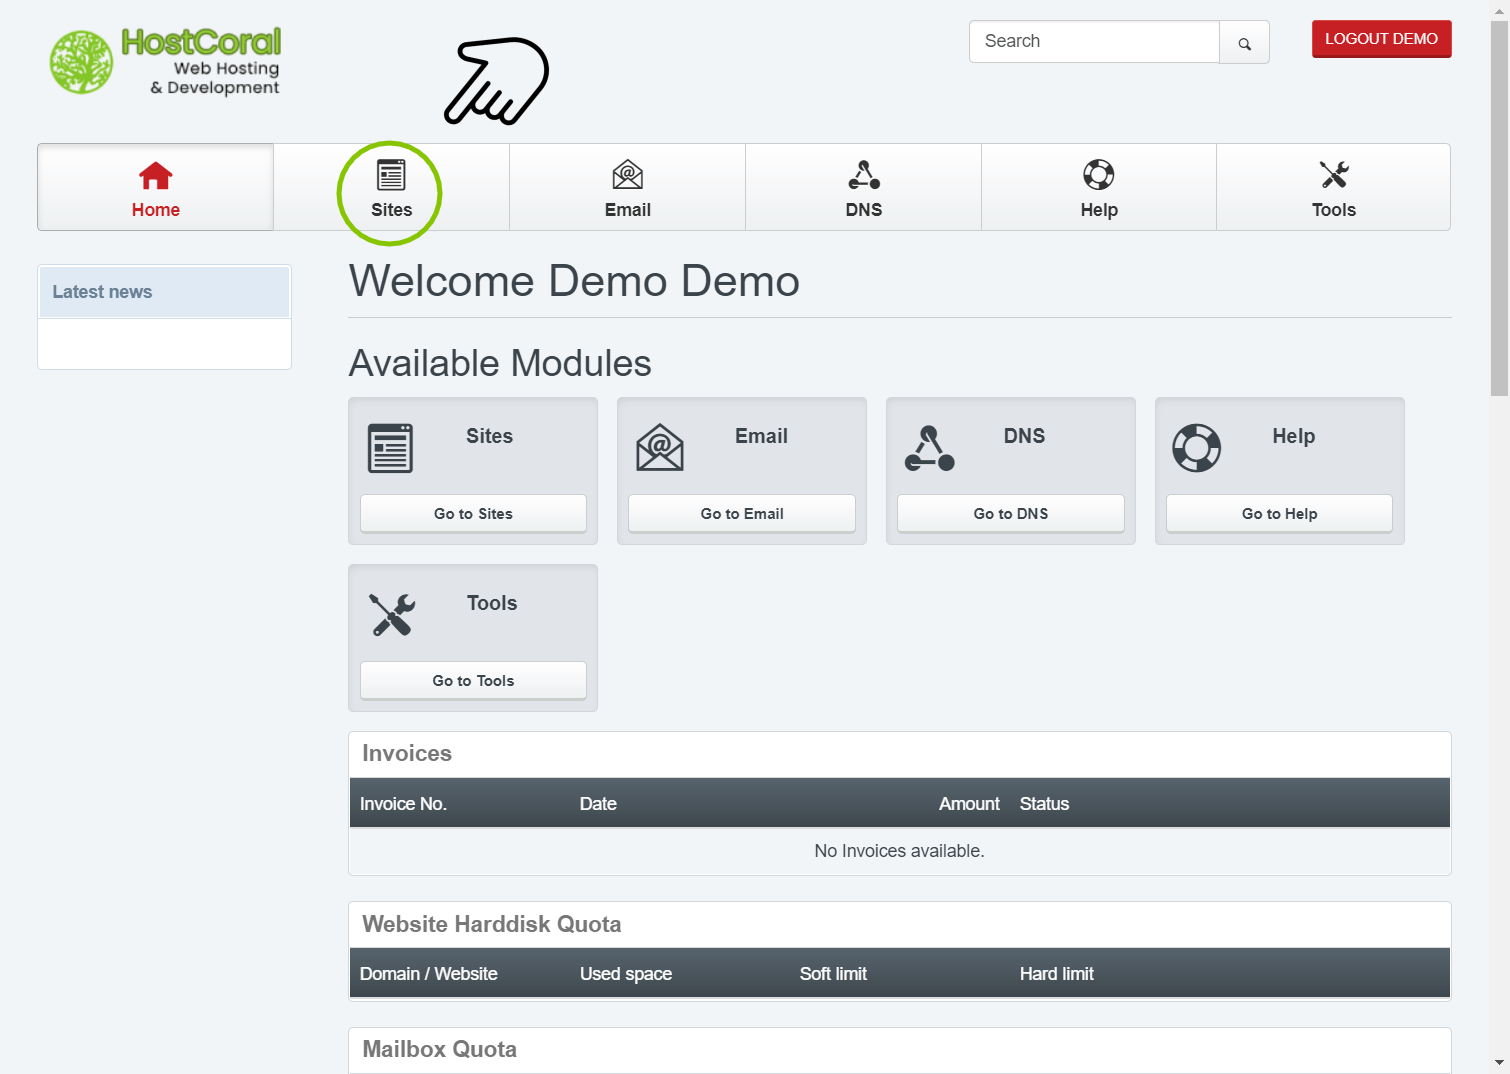
- Dashboard – To get started, login here to your control panel. After logging in, click on the “Sites” tab/button at the top of your dashboard.
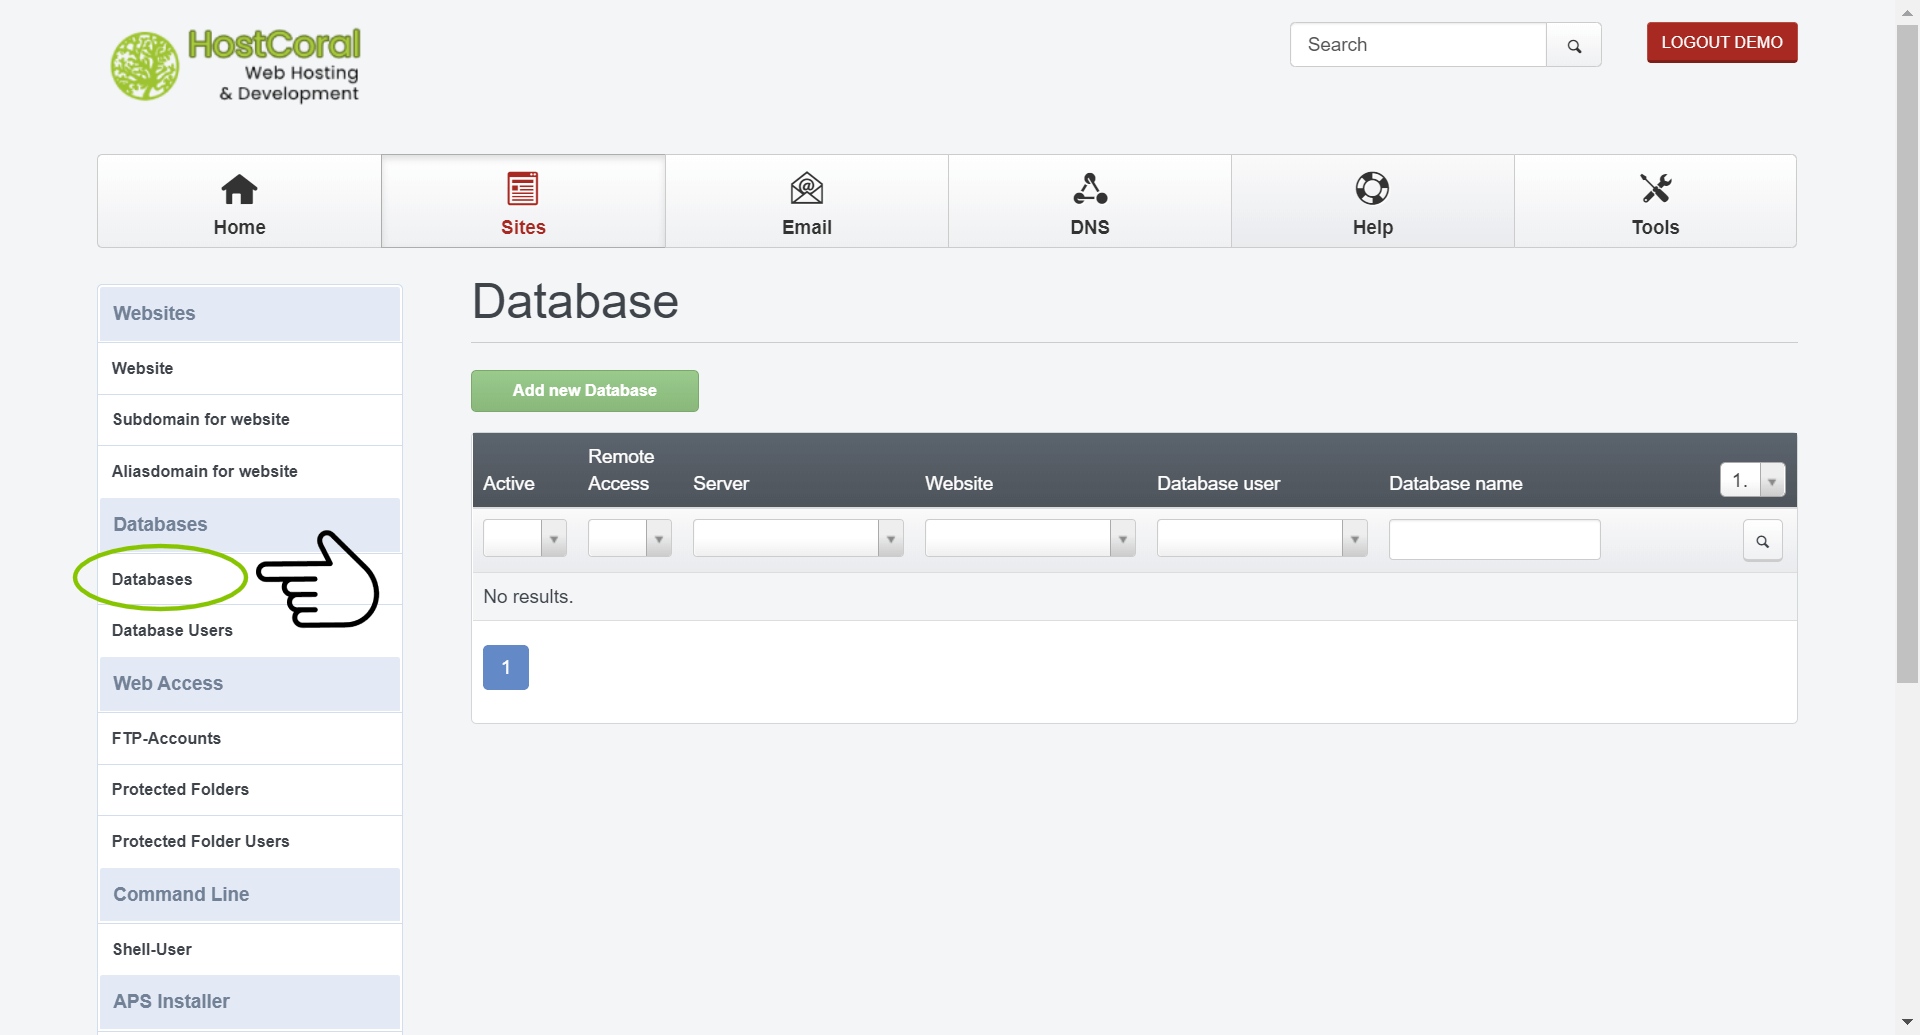
2. Sites – Click on the “Databases” option located at the left sidebar under the Databases section.
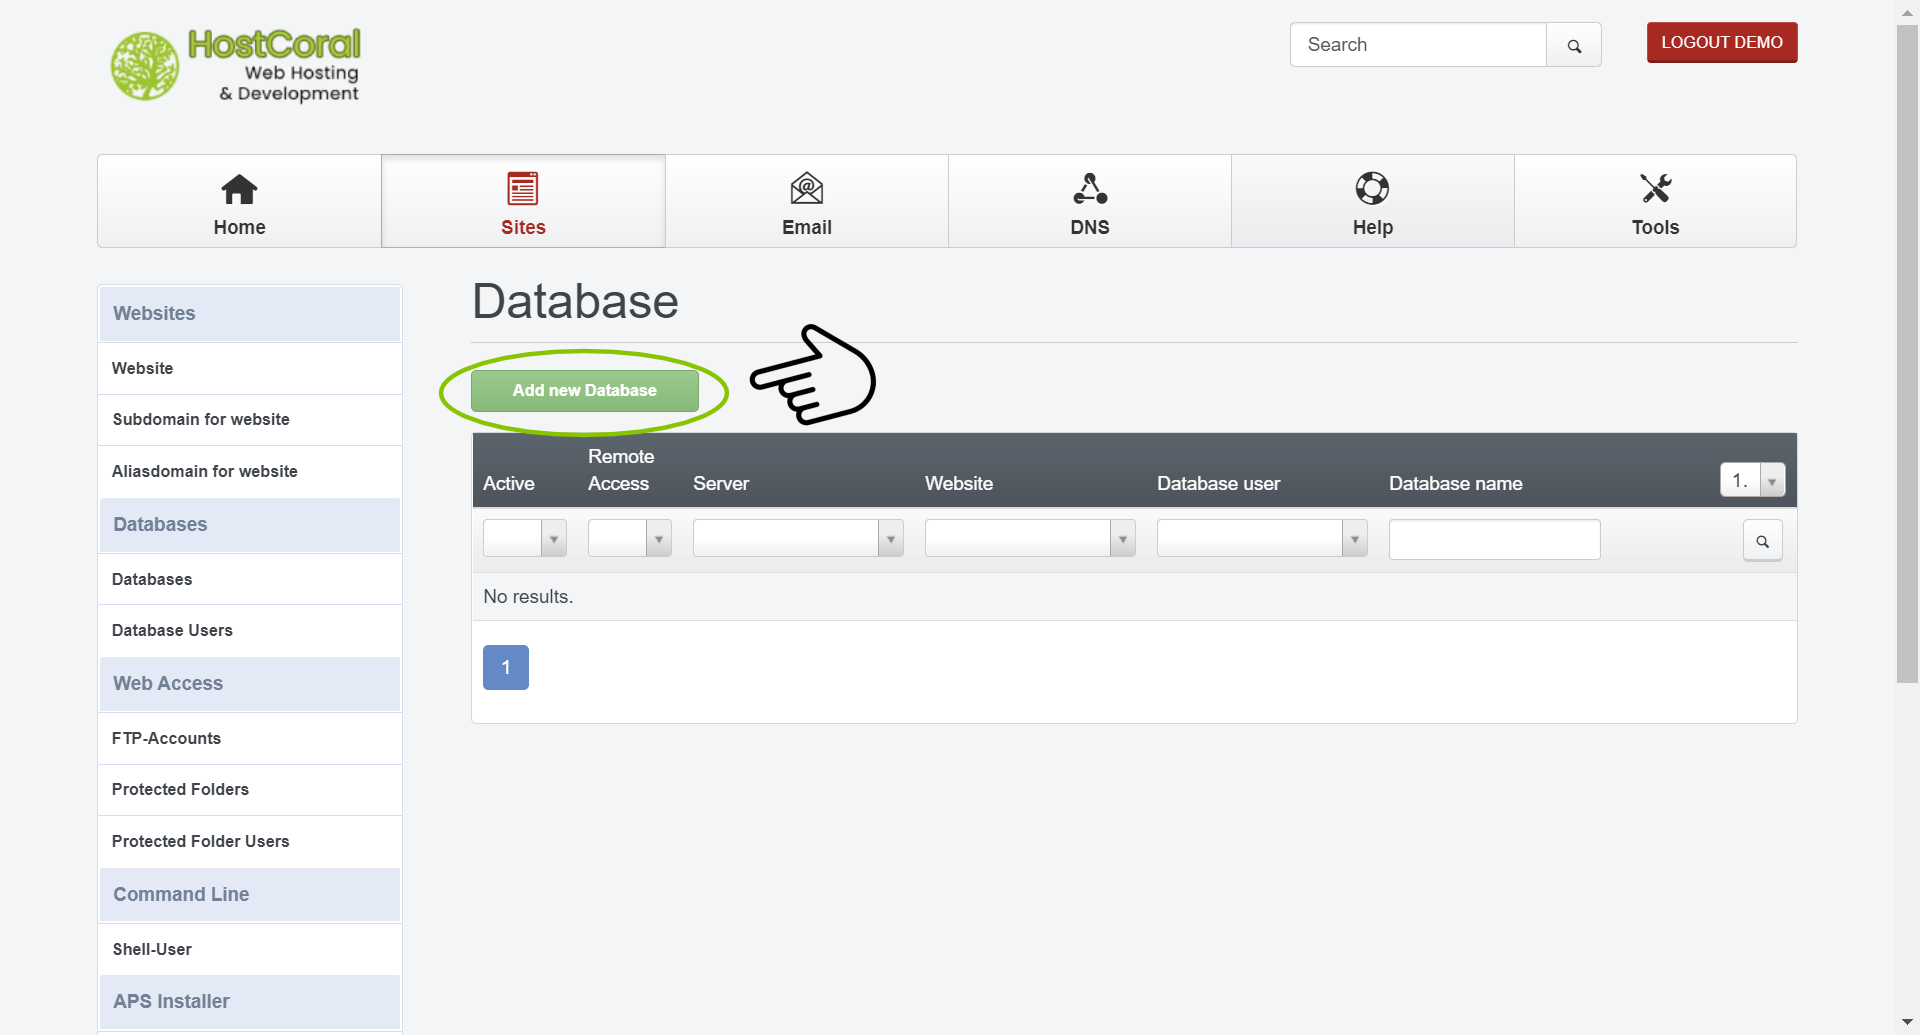
3. Sites – Click on the “Add new Databse” button located under the navigation menu.
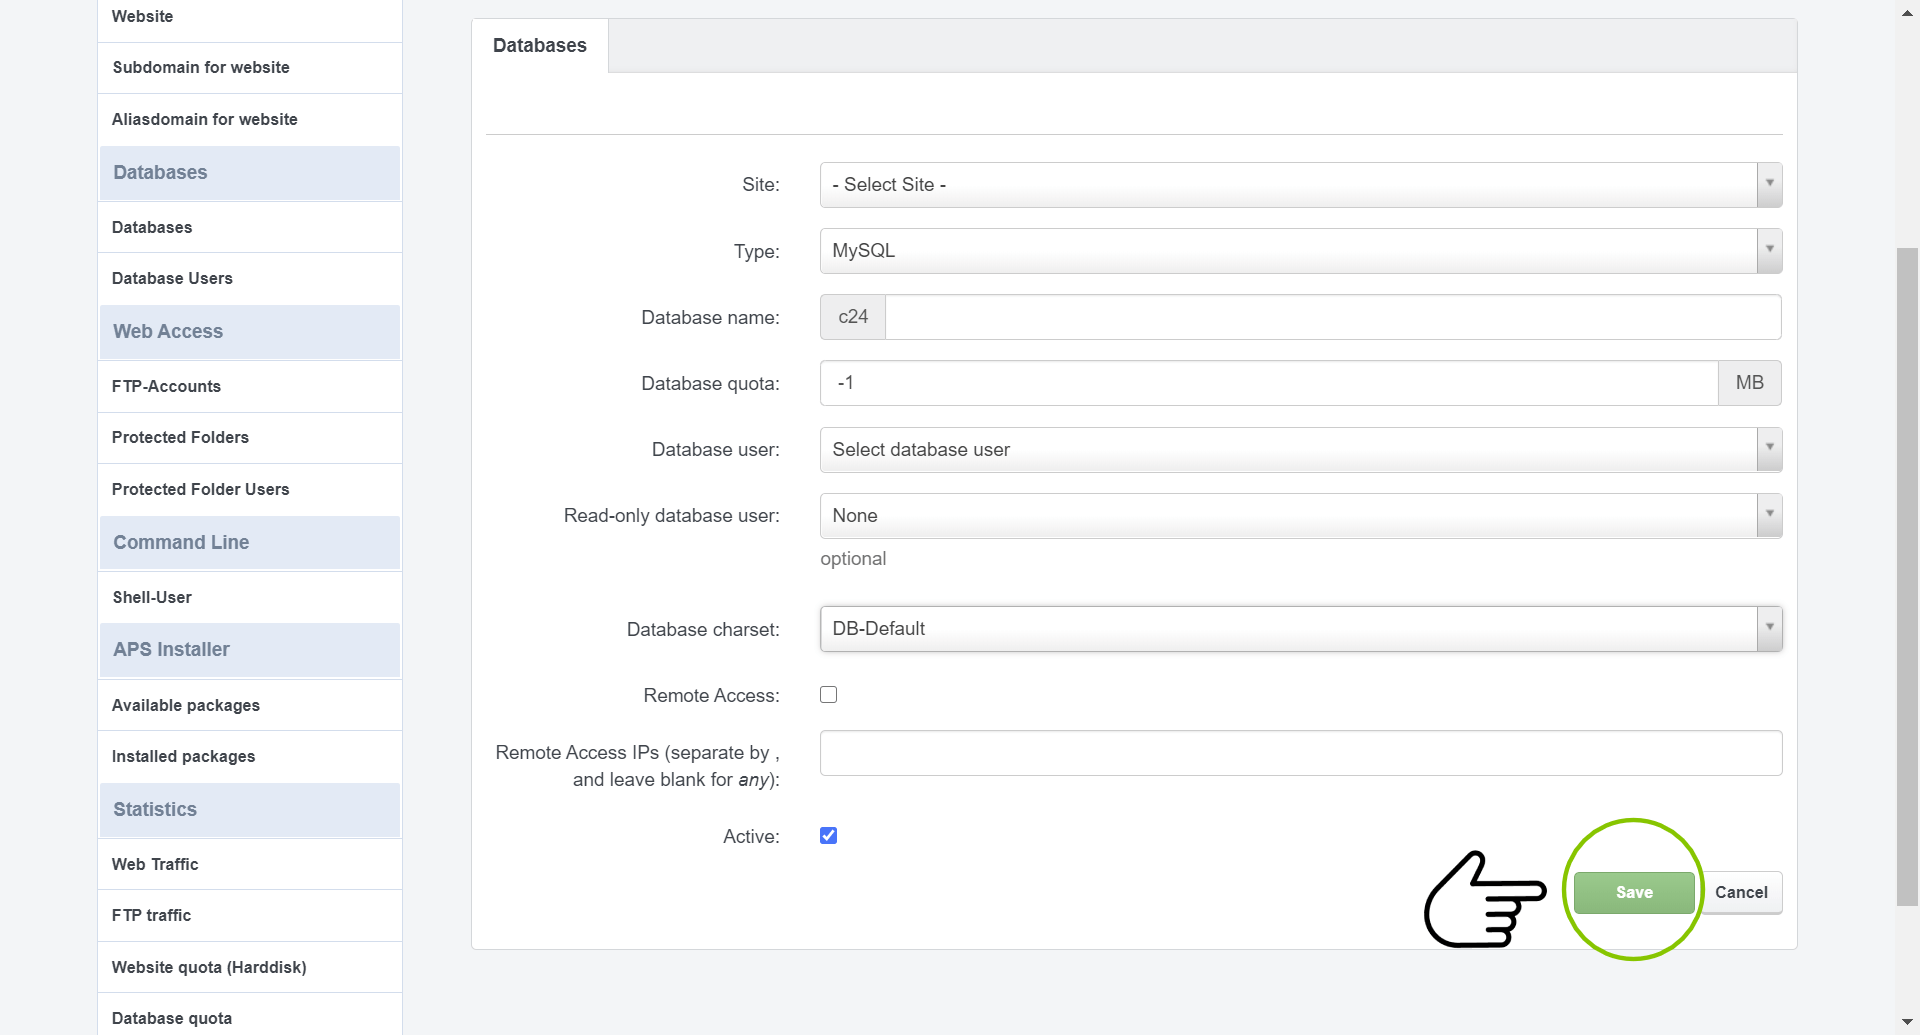
4. Databases – before you can setup a database make sure you have added your website and added a database user.
- Site – Select the website to which the database belongs.
- Type – Select the database type needed for your website
- Database name – Type your database name. It’s name will be prepended with your customer ID.
- Database quota – Set a limit for your website’s database. We recommend to leave this field’s value as “-1”
- Database user : Select a database user to access your database. We recommend no more than 1 user per database.
- Read-only database user – Select a database user with read-only access. This is optional
- Database char-set – Select the database character set needed for your database
- Remote Access – Allow your database to be accessed remotely
- Remote Access IPs (separate by , and leave blank for any) – If remote access is permitted, the connecting server’s IP address must be added
- Active – Check to enable. Enabled by default. If this option is not enabled, your database will not be available
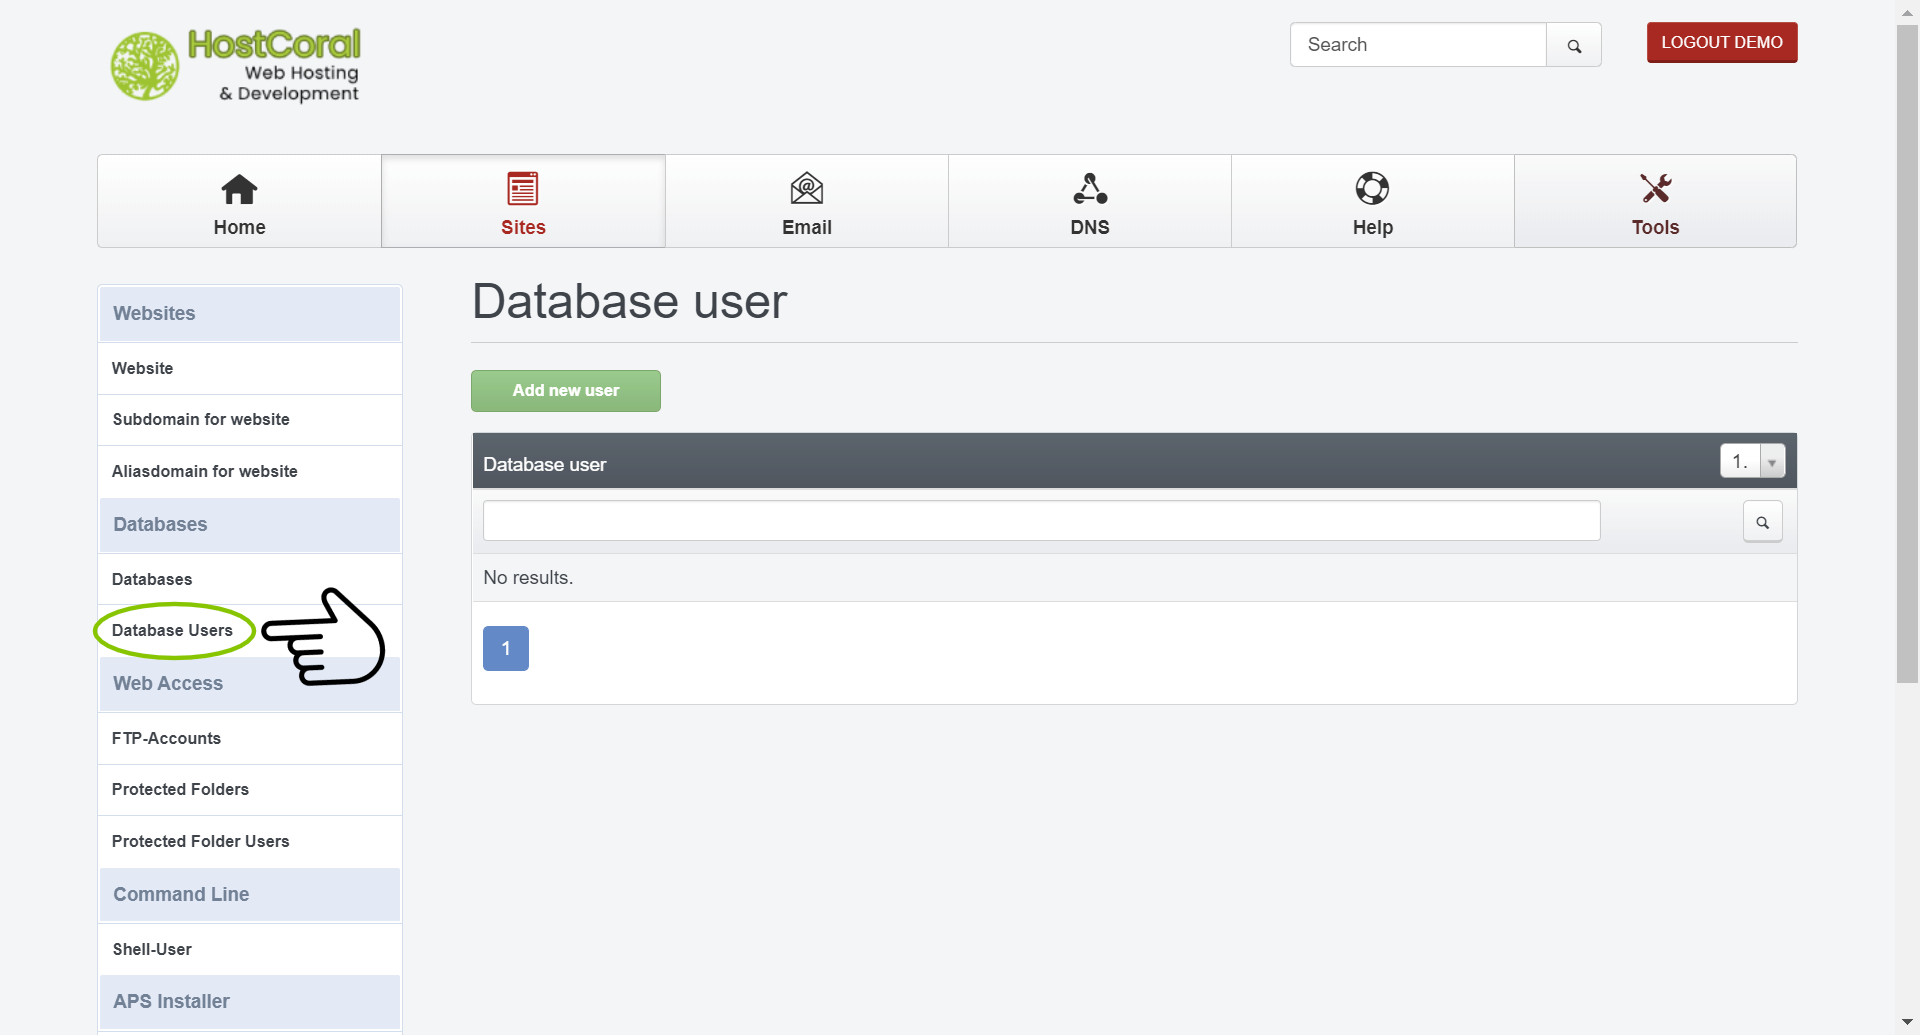
5. Database Users – Click on the “Database Users” option located at the left sidebar under the Databases section.
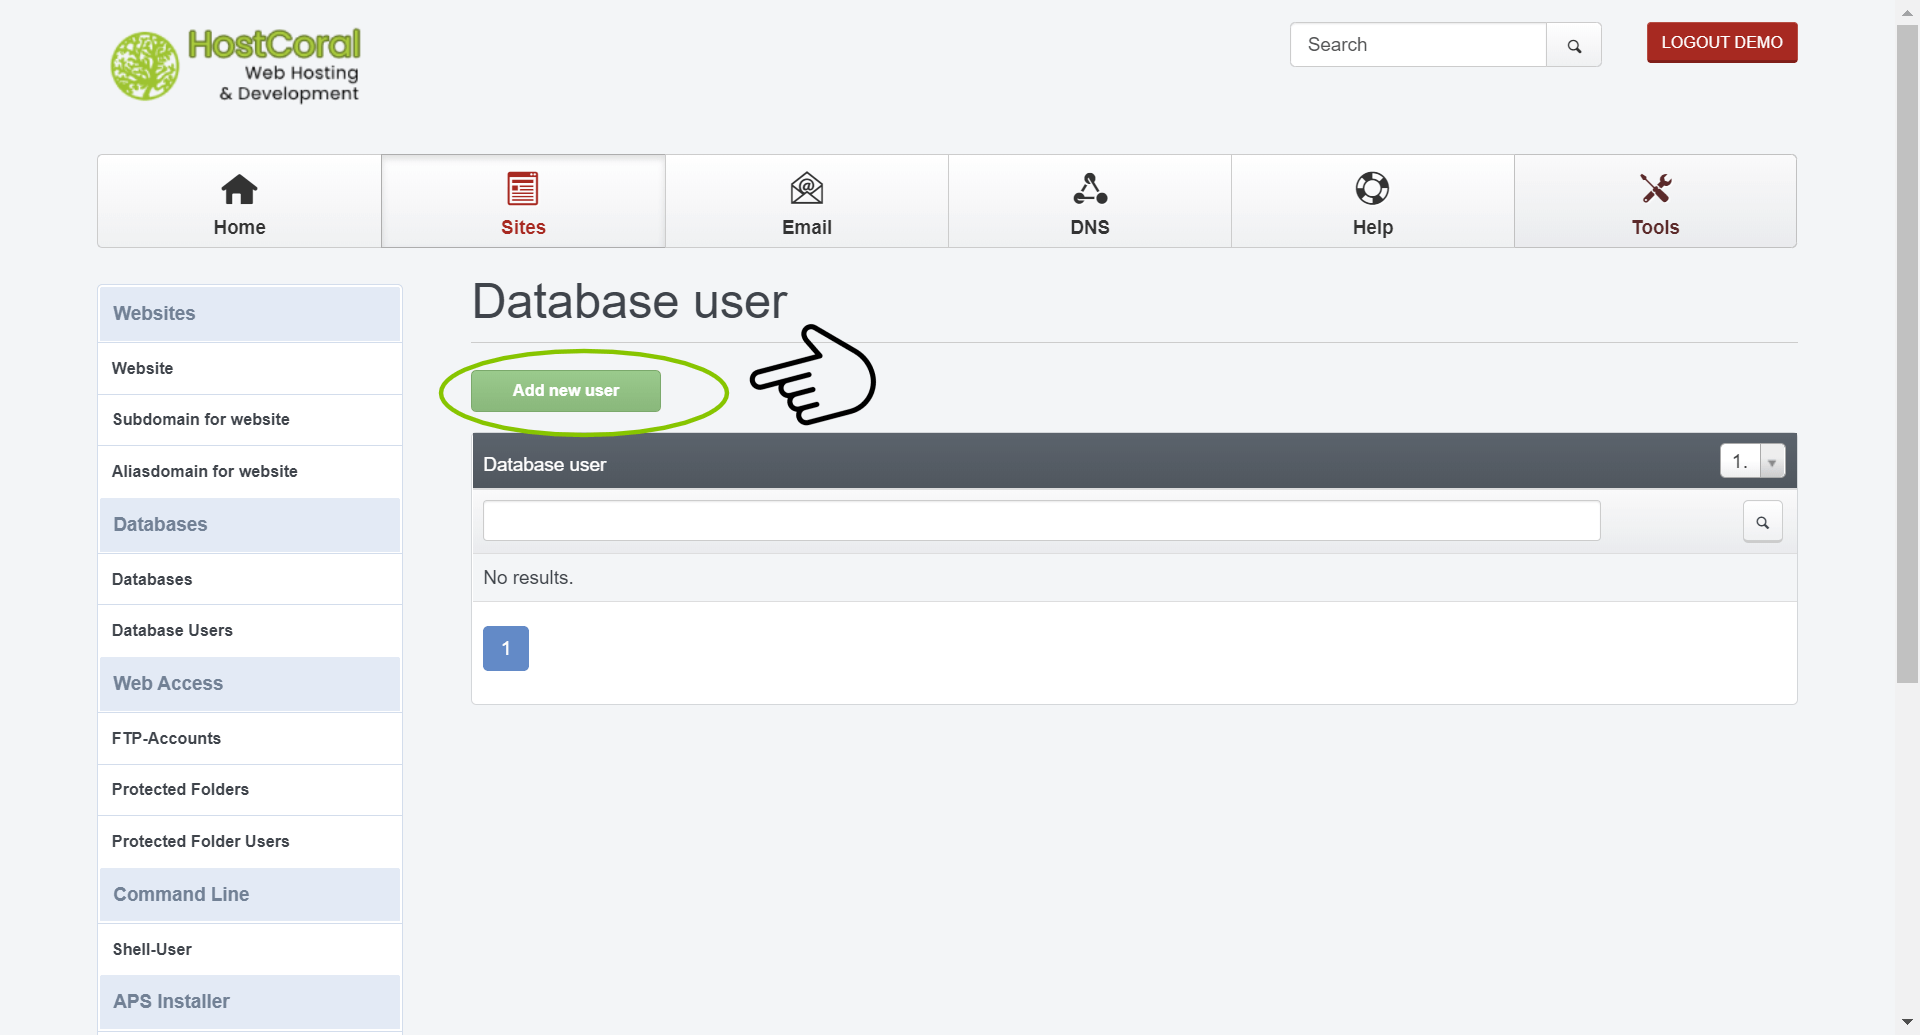
6. Database Users – Click on the “Add new user” button located under the navigation menu.
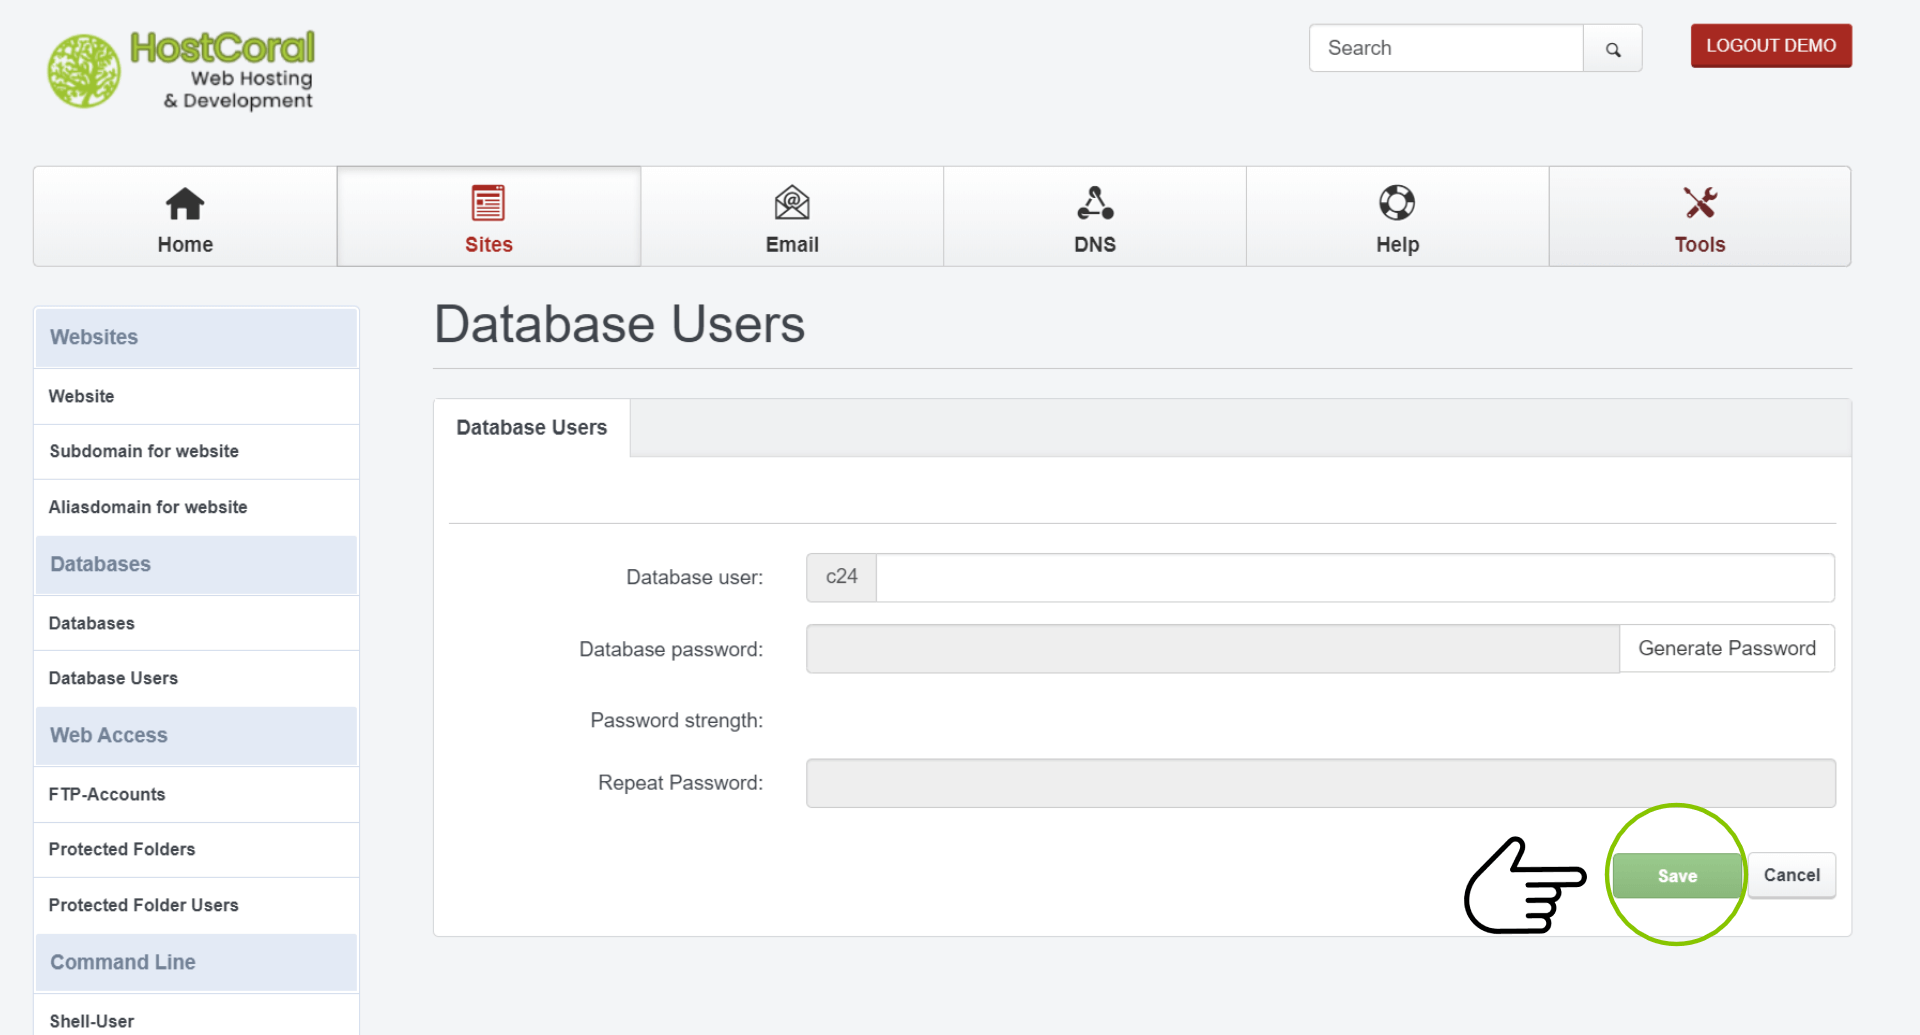
7. Database Users
- Database user – Type your database user’s name, it’s name will be prepended with your customer ID
- Database password – Type or click on the “Generate Password” button to set your database user’s password
- Password strength – strength of your current password
- Repeat password – Fill in your password
- Click on the “save” button to save your settings