The blow guide will help you configure your domains DNS.
If you experience any issues while setting up your DNS, contact us here to help assist with any problems.
How to setup DNS for your website
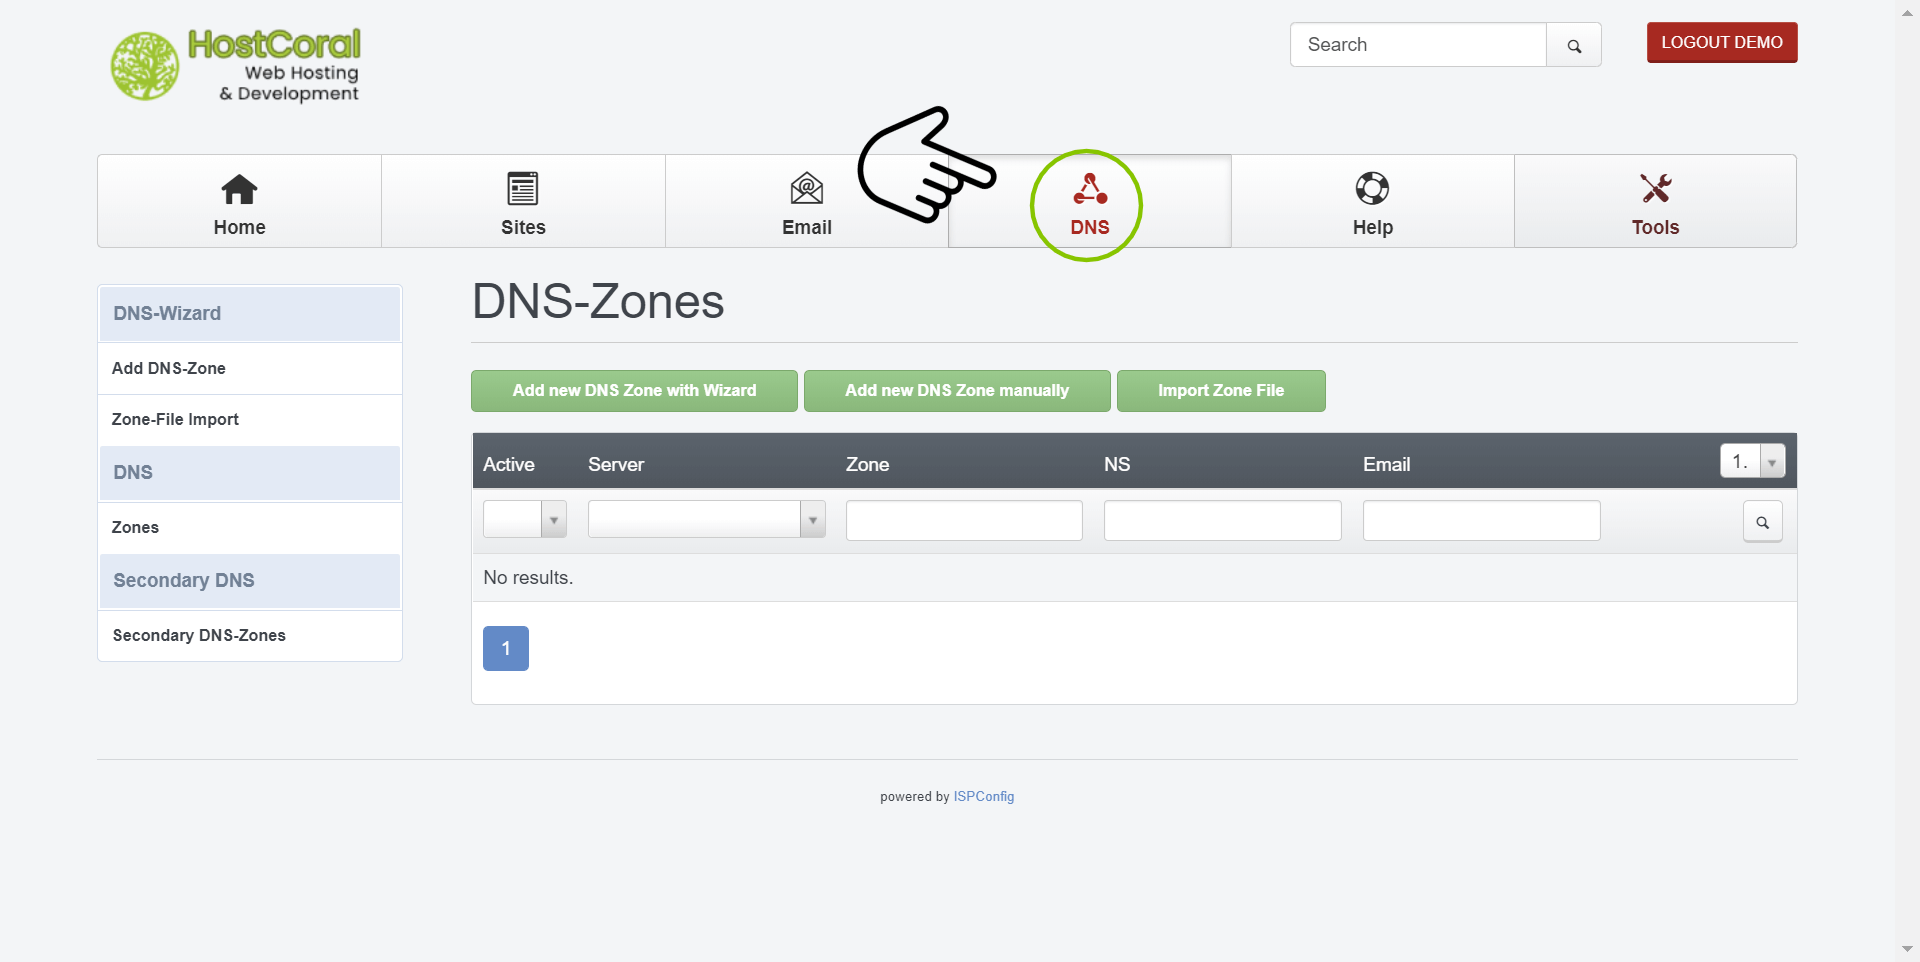
- Dashboard – To get started, login here to your control panel. After logging in, click on the “DNS” tab/button at the top of your dashboard.
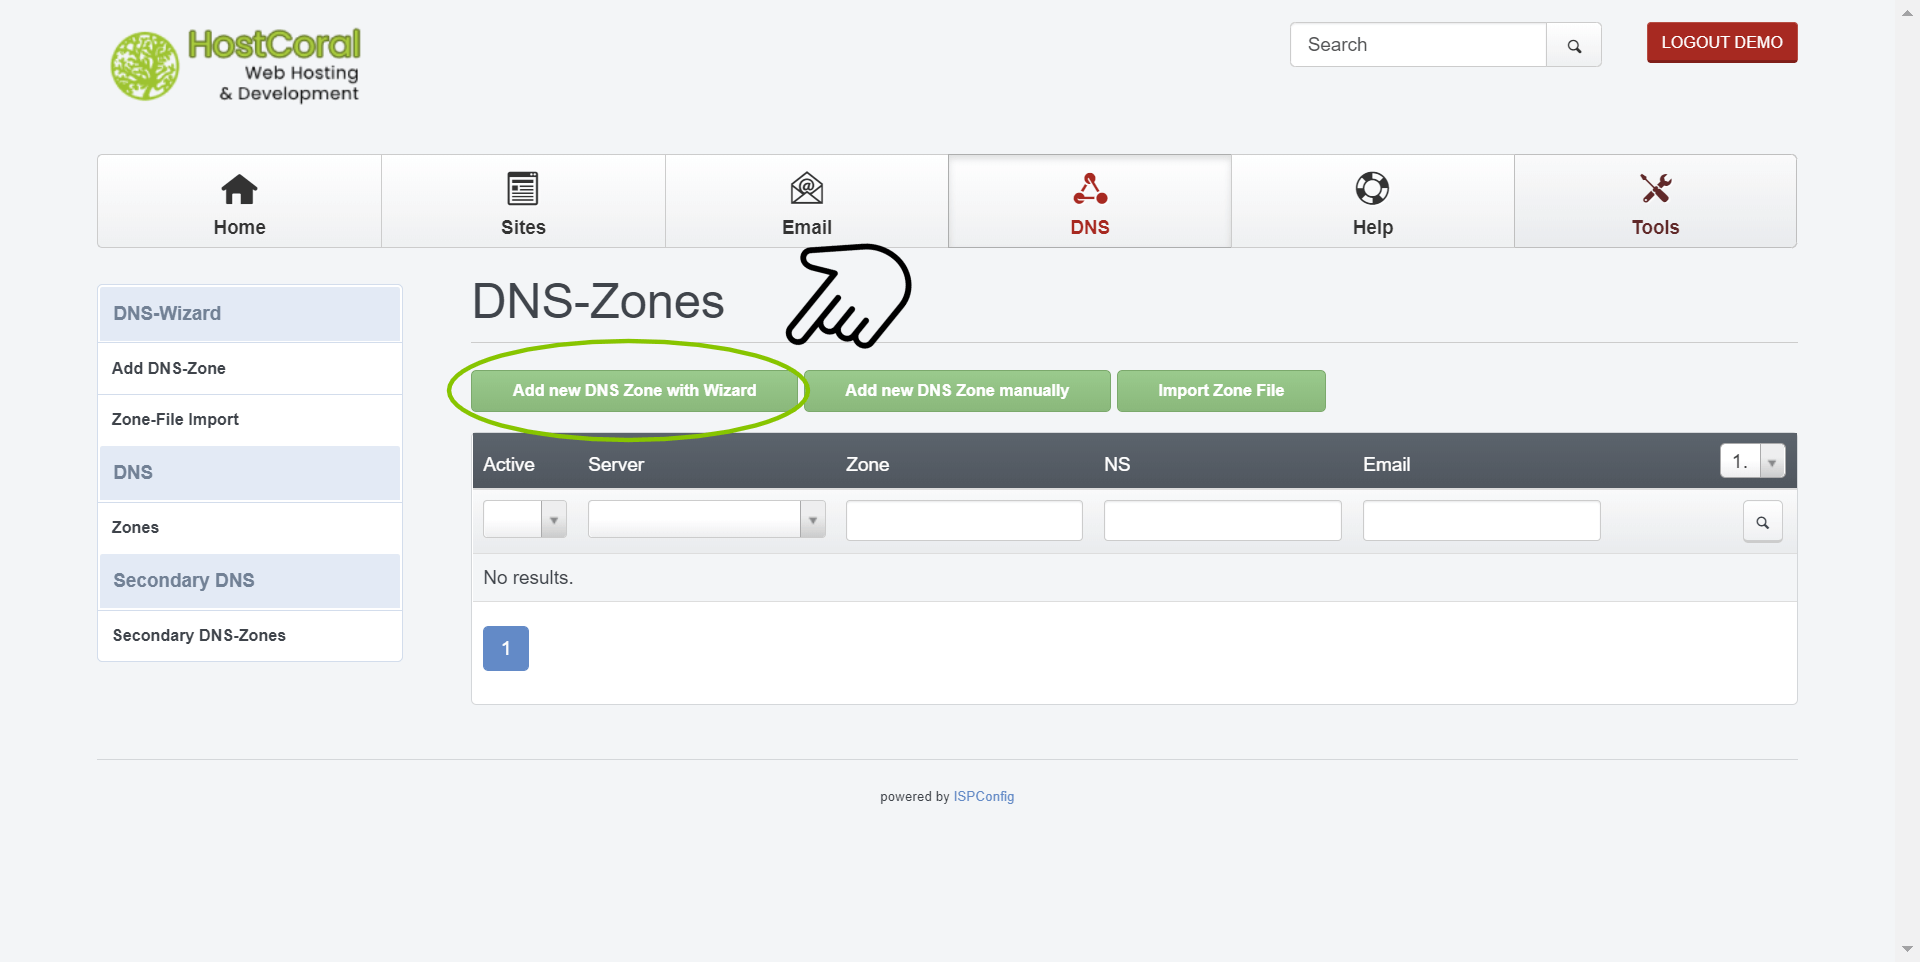
2. DNS – Click on the “Add new DNS Zone with Wizard” button to get started setting up your website’s wizard.
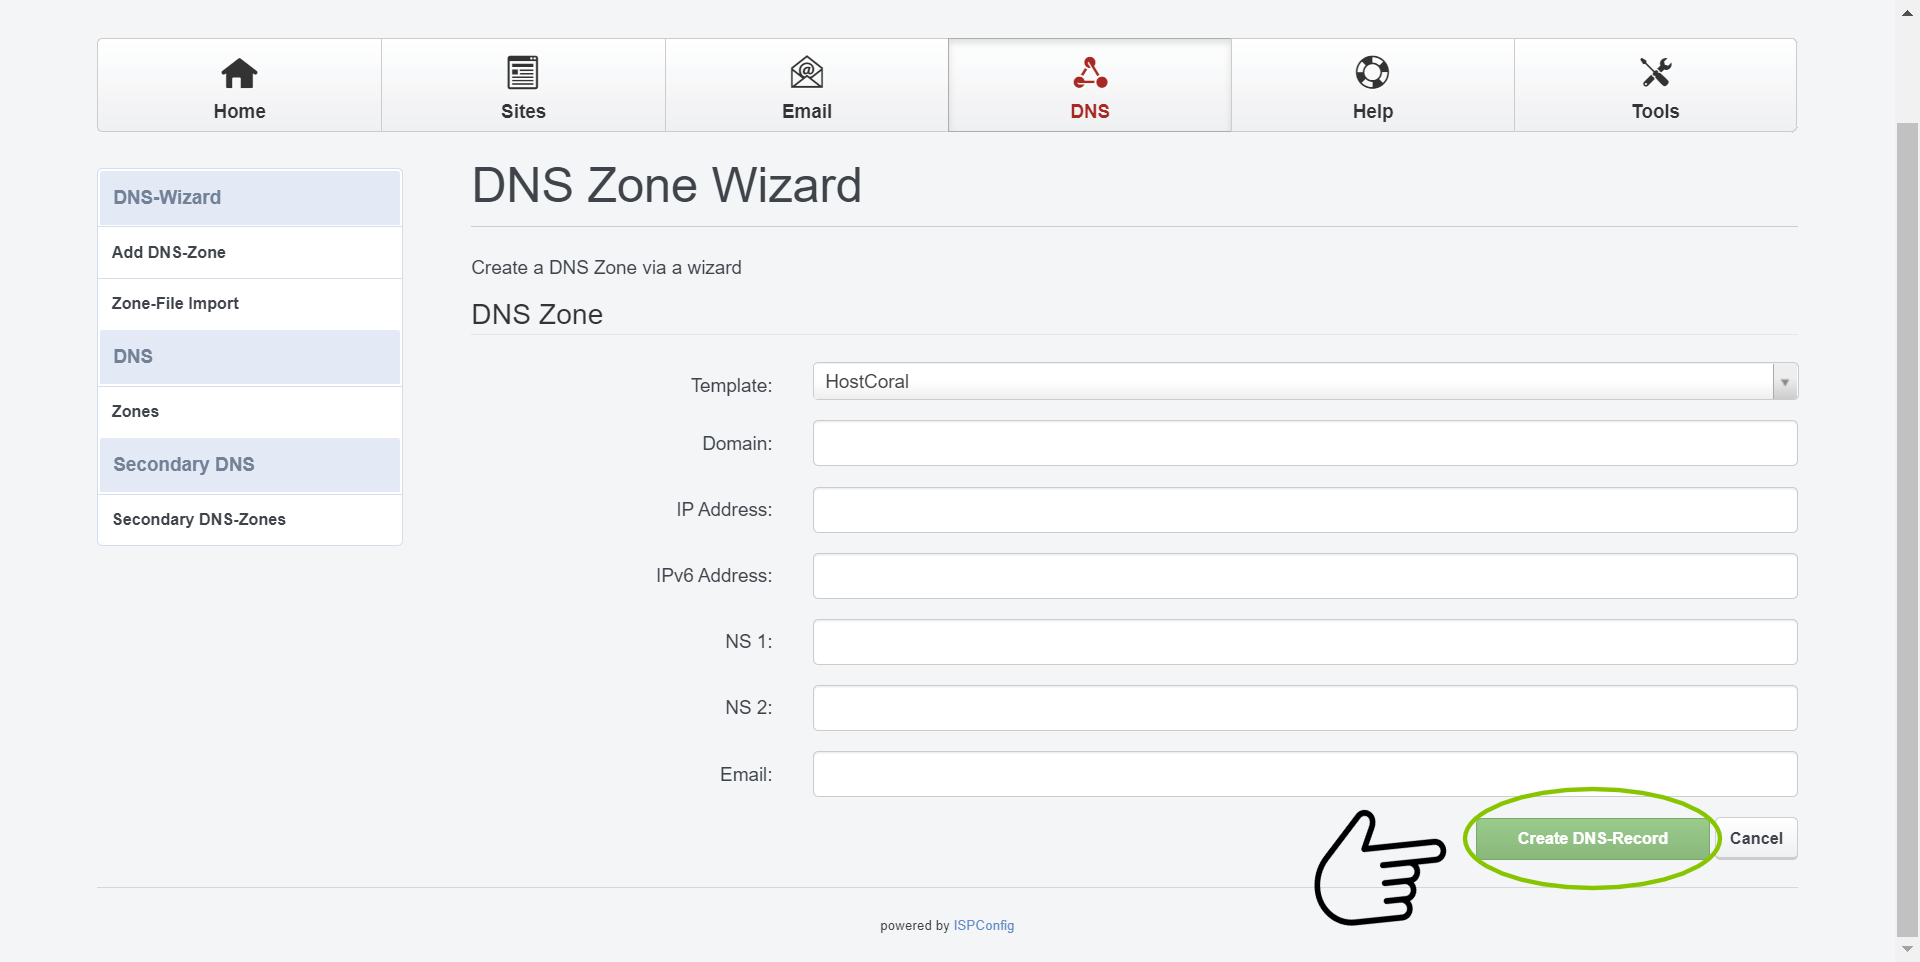
3a. DNS Zone Wizard (skip step 3b)
- Template – This is default “Hostcoral” and should remain as is
- Domain – Fill in the full address of the website you are trying to add, example; “mywebsite.com”, make sure to exclude all white spacing
- IP Address – The IP Address of your web server. To find the IP address of your web server
- IPv6 Address – If available, add your web server’s IP6 address
- NS1 – default : ns1.hostcoral.com
- NS2 – default : ns2.hostcoral.com
- Email – Your website’s main address. We recommend webmaster@yourdomain.com. “yourdomain” is only an example and should be replaced with your actual domain
- Click on the “Create DNS-Reord” button to add your required settings
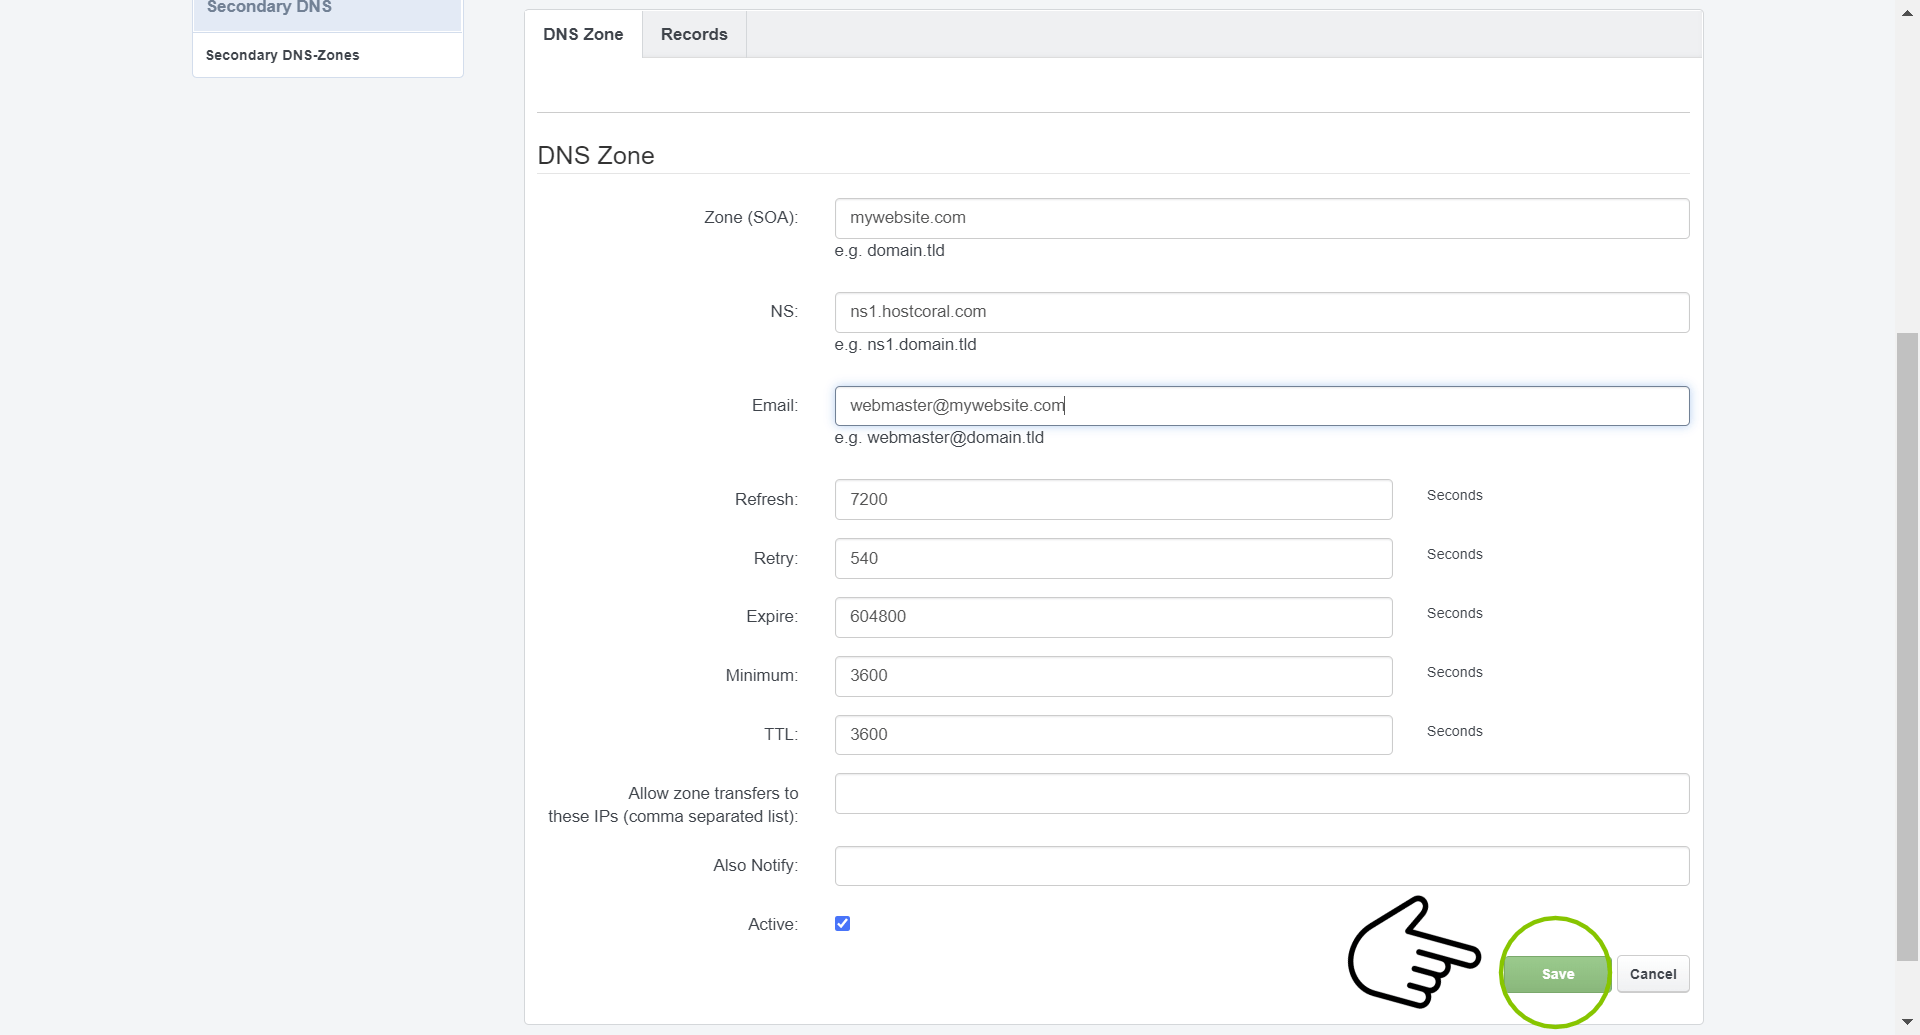
3b. DNS Zone Manual (skip step 3a)
- Zone (SOA) – Fill in the full address of the website you are trying to add, example; “mywebsite.com”, make sure to exclude all white spacing
- NS – ns1.hostcoral.com
- Email – Your website’s main address. We recommend webmaster@yourdomain.com. “yourdomain” is only an example and should be replaced with your actual domain
- Refresh – refresh rate : 7200 (default)
- Retry – retry rate : 540 (default)
- Expire – expiry rate : 604800 (default)
- Minimum – minimum rate – 3600 (default)
- TTL – time to live – 3600 (default)
- Allow zone transfers to
these IPs (comma separated list) – Domain IP addresses that are allowed to receive transfer files. Empty by default - Also Notify – Domain IP addresses that receive a transfer notification. Empty by default
- Active – Make sure this option is checked. If unchecked your email DNS settings will not be available
- Click on the “Save” button to add your required settings
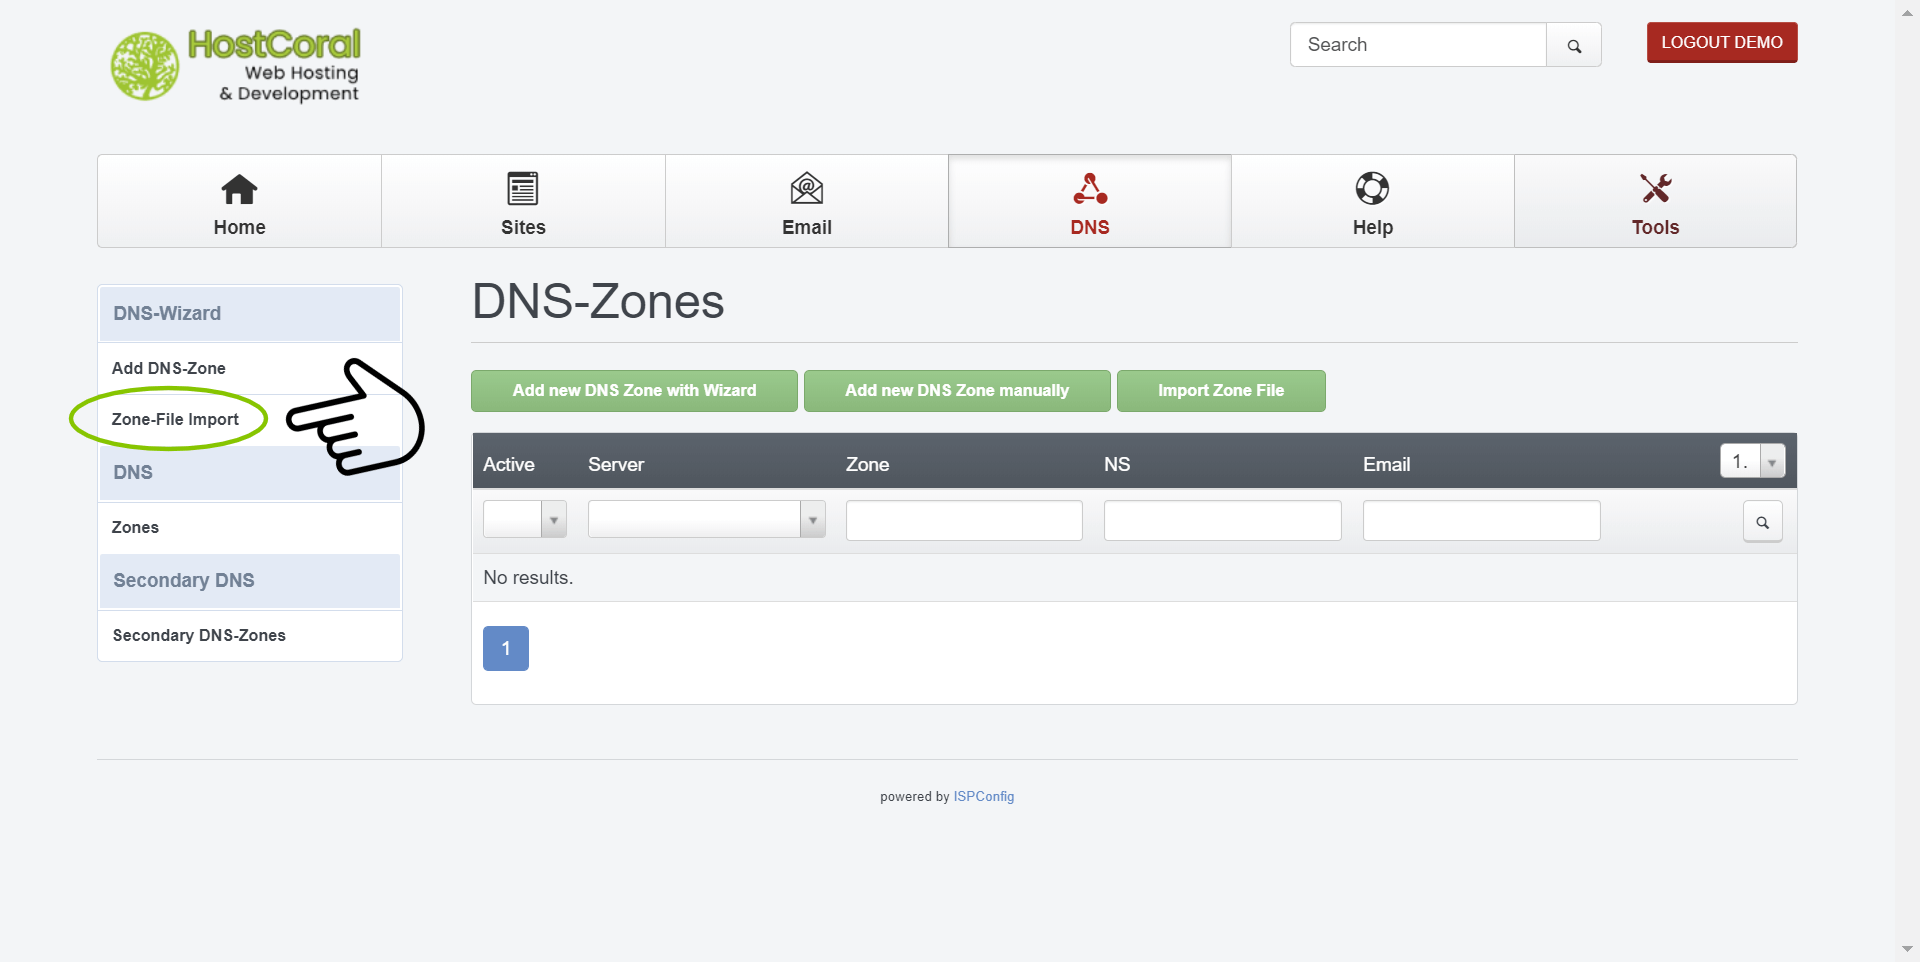
4. Zone-File Import
- If you would like to import your current DNS settings for quicker DNS setup, you can use the DNS importer to accelerate the process.
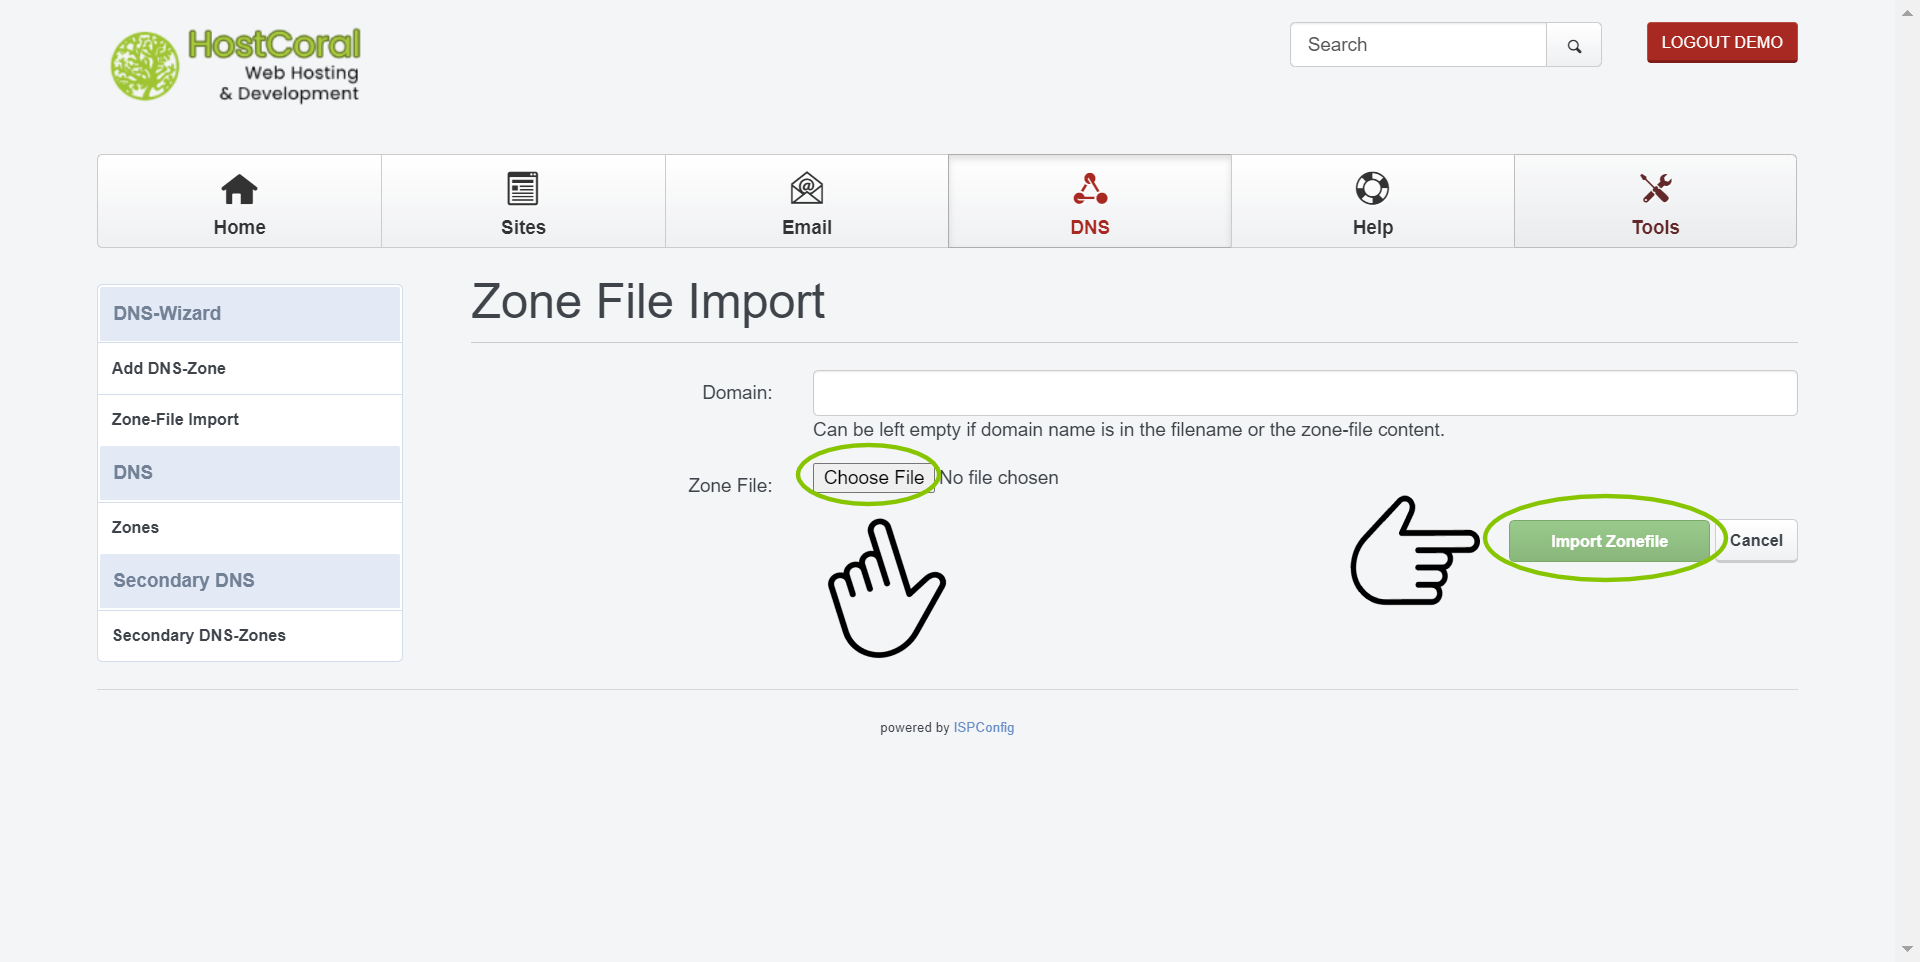
5. Zone-File Import
- Domain – Type your full domain of the zone file you are trying to add. If the zone file already contains the settings for domain name, you may leave this field empty. We recommend filling this field in
- Zone file – Click on the “Choose file” button to attach your file to the upload form. This does not actually upload the file
- Click on “Import Zonefile” to start the upload of your zone file
- If you experience any issues uploading our zone file, make sure your zone file is in the correct file type, properly formatted and valid.
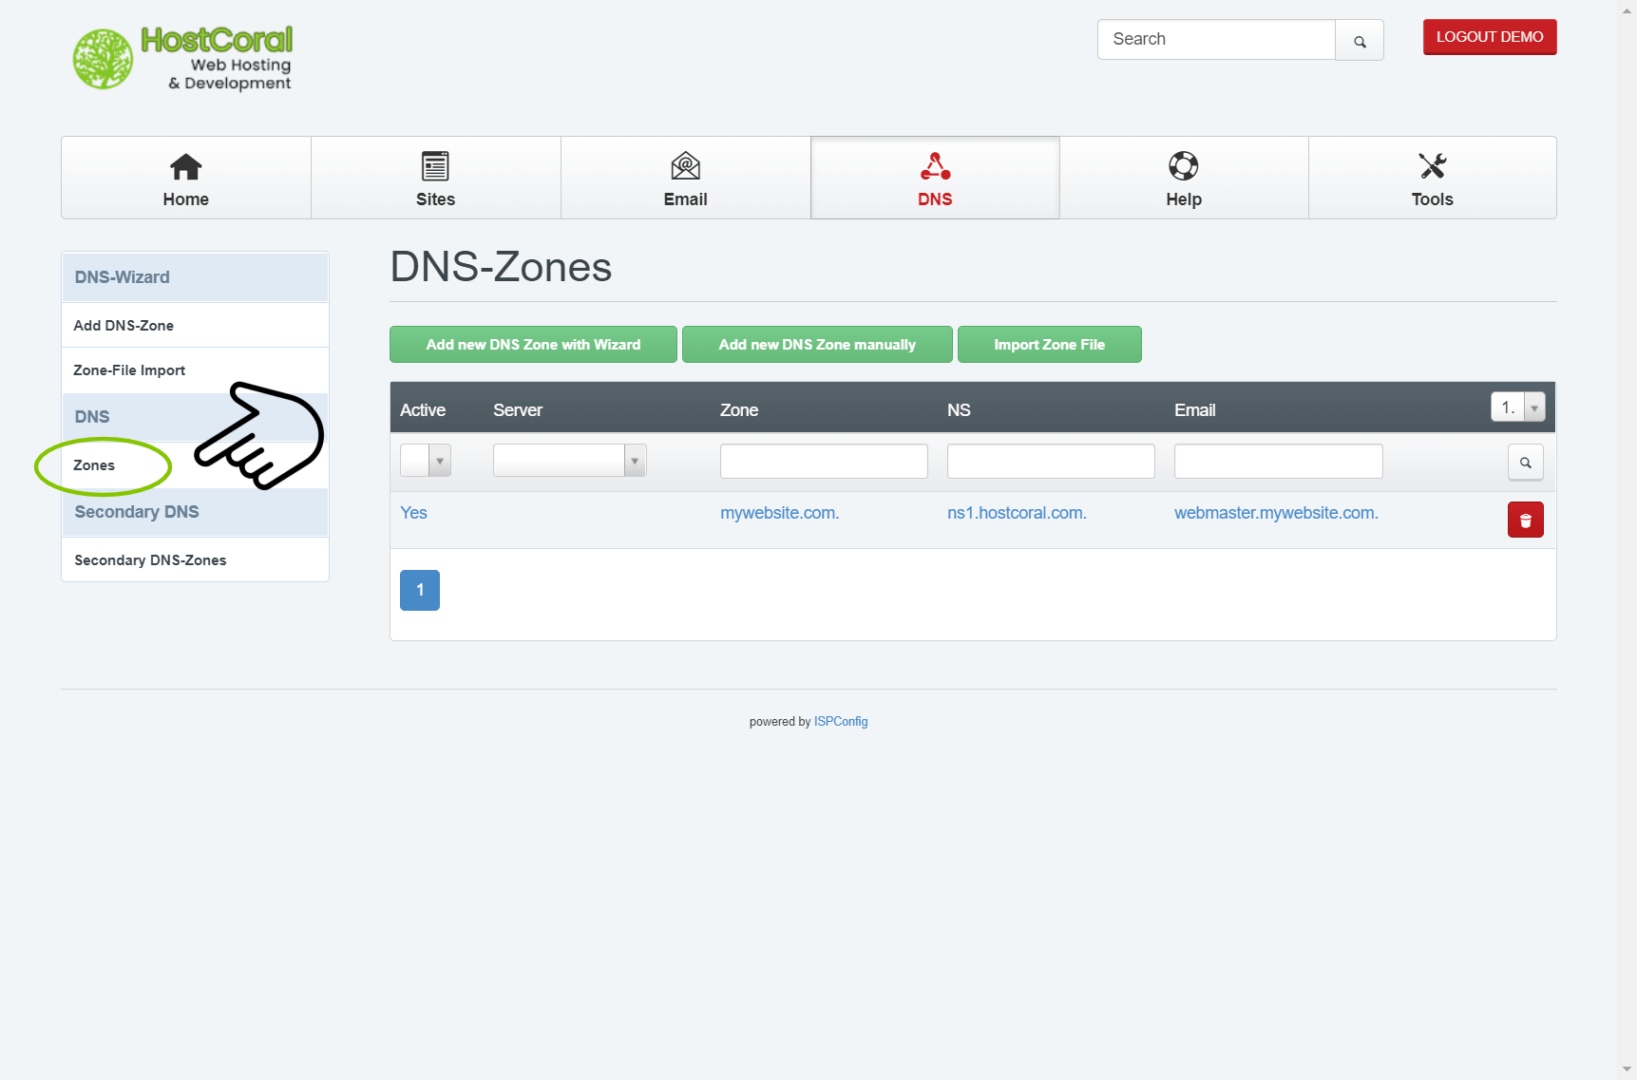
6. Zones
- Make changes or remove your current DNS zones. If you would like to import your current DNS settings for quicker DNS setup, you can use the DNS importer to accelerate the process.
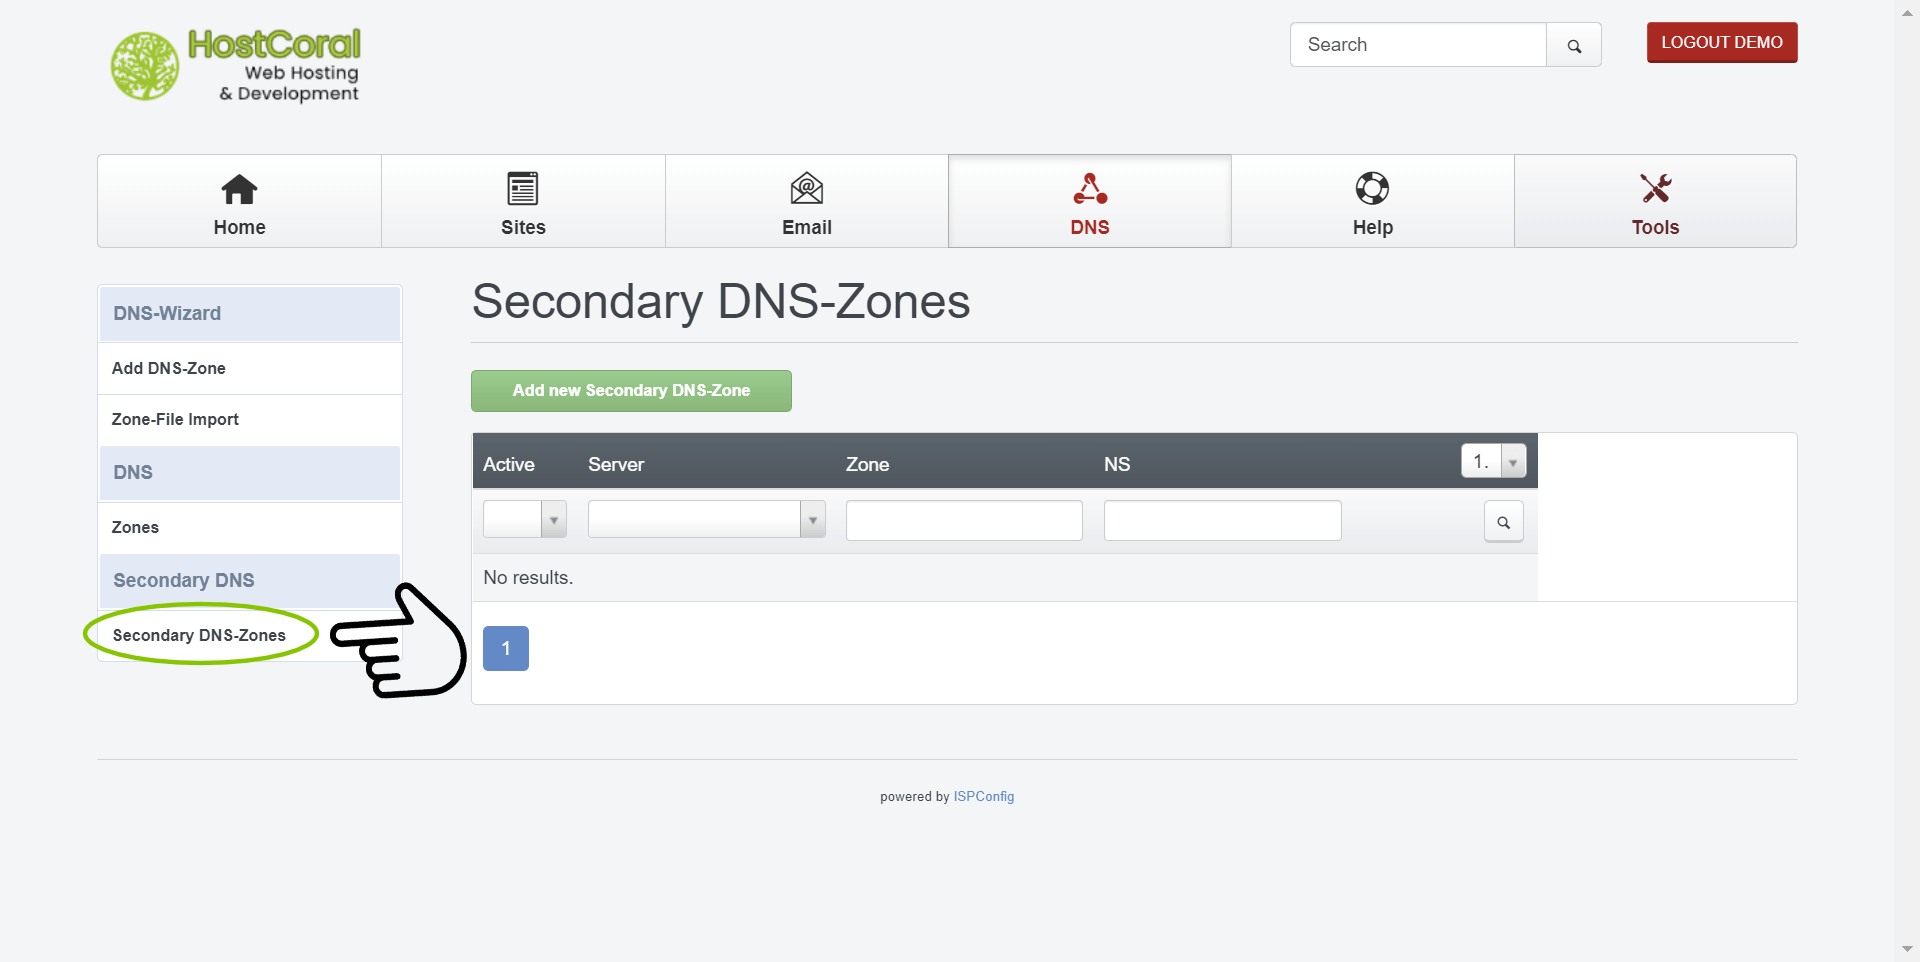
7a. Secondary DNS-Zones – Click on the “Secondary DNS-Zones” located at the left sidebar under the section Secondary DNS
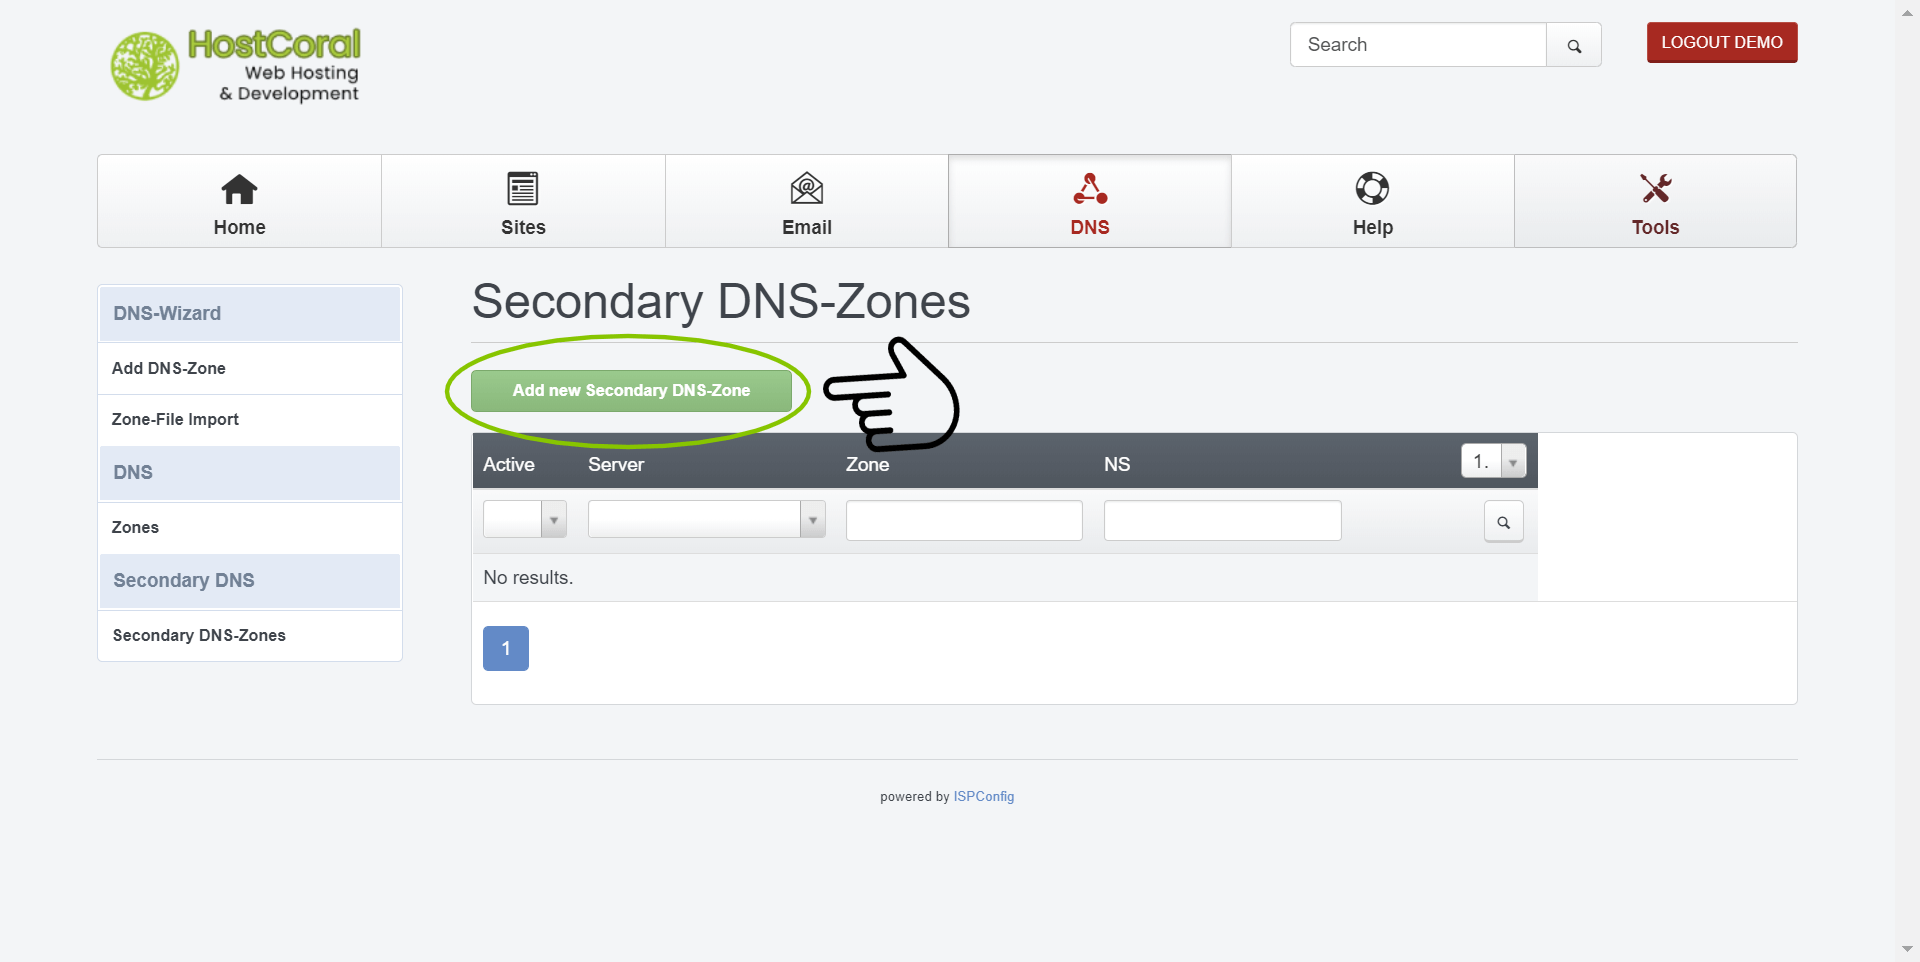
7b. Secondary DNS-Zones – Click on the “Add new Secondary DNS-Zone” button just below the navigation menu
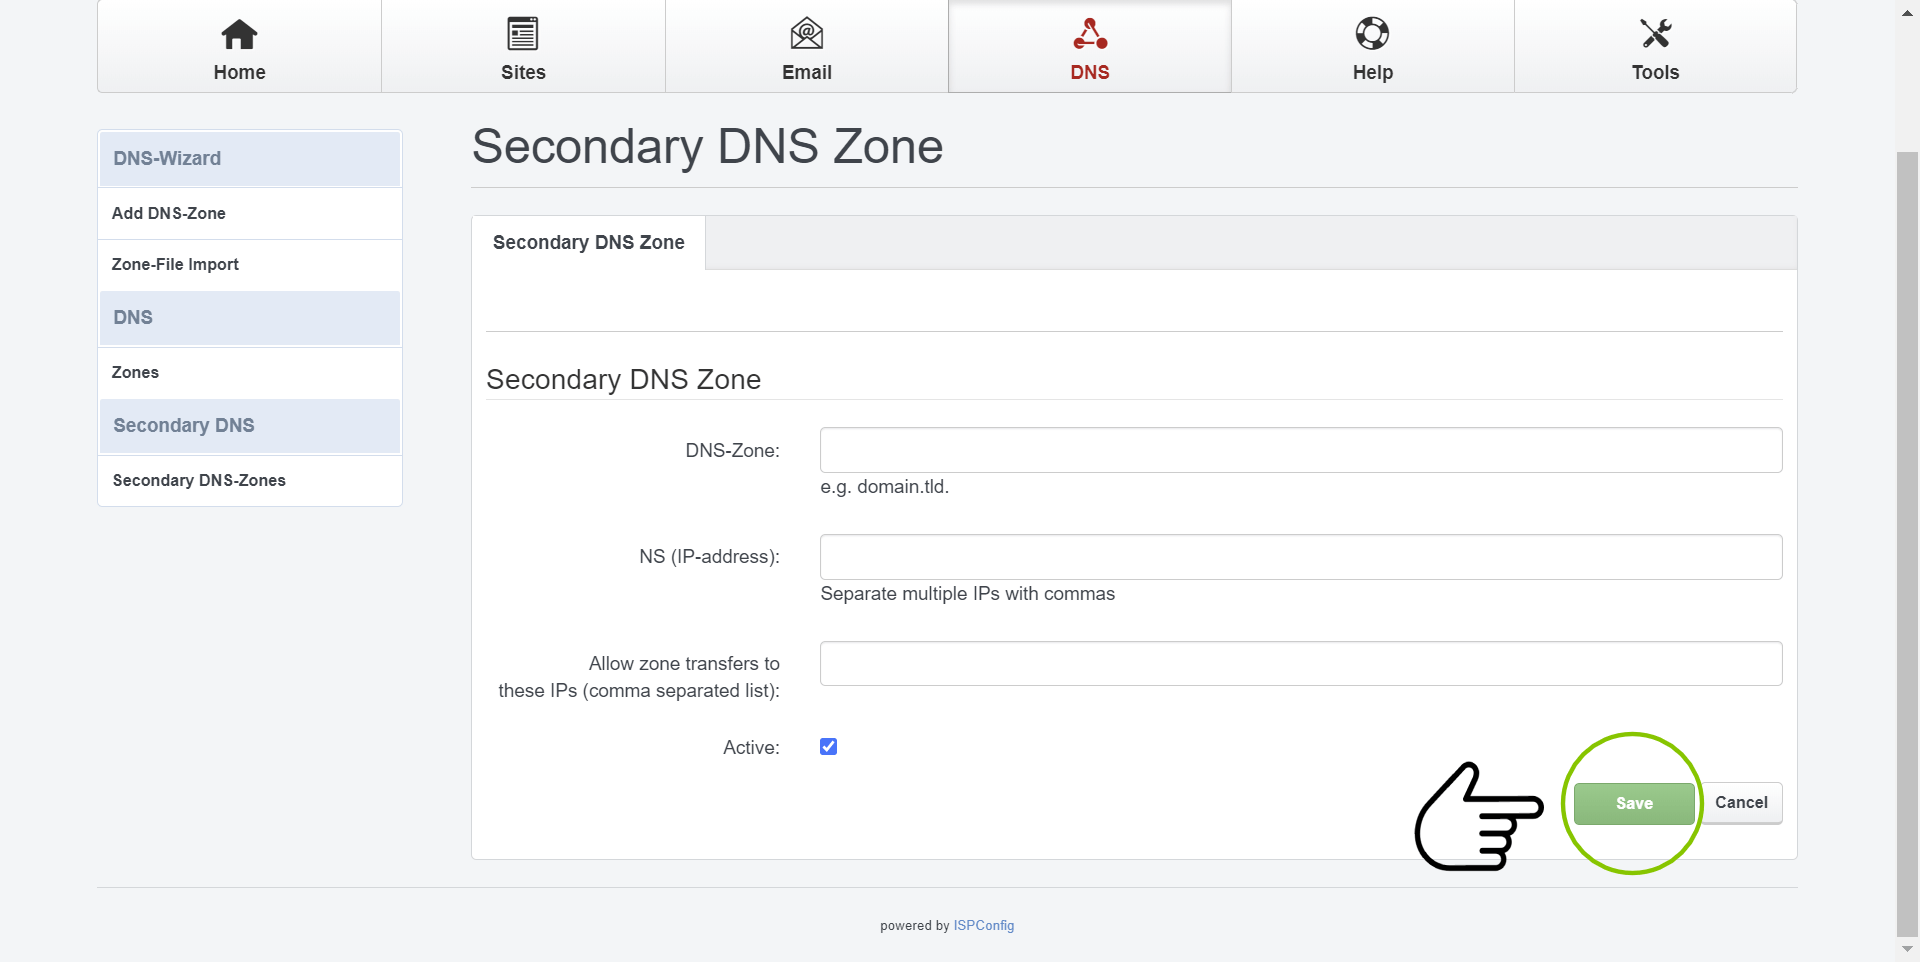
7c. Secondary DNS-Zones
- DNS-Zone – Fill in the full address of the website you are trying to add, example; “mywebsite.com”, make sure to exclude all white spacing
- NS (IP-address) – Enter all secondary DNS servers IP-addresses (IP4) separated by comma,
- Allow zone transfers to
these IPs (comma separated list) – Domain IP addresses that are allowed to receive transfer files. Empty by default - Active – Make sure this option is checked. If unchecked your DNS zone will not be available
- Click on the “Save” button to add your required settings