The guide below is intended to assist you in setting up your email account for android and PC. Follow each respectively. These settings also work on Apple iPhone mobile iOs & Apple Os
Email account setup in Outlook for
Android & PC
Before you can add your email mailbox make sure that you have already set up your email mailbox or you will need to set up a new email address via our “How to create a new email” guide. You can also access your mailbox via the webmail portal.
For Android devices
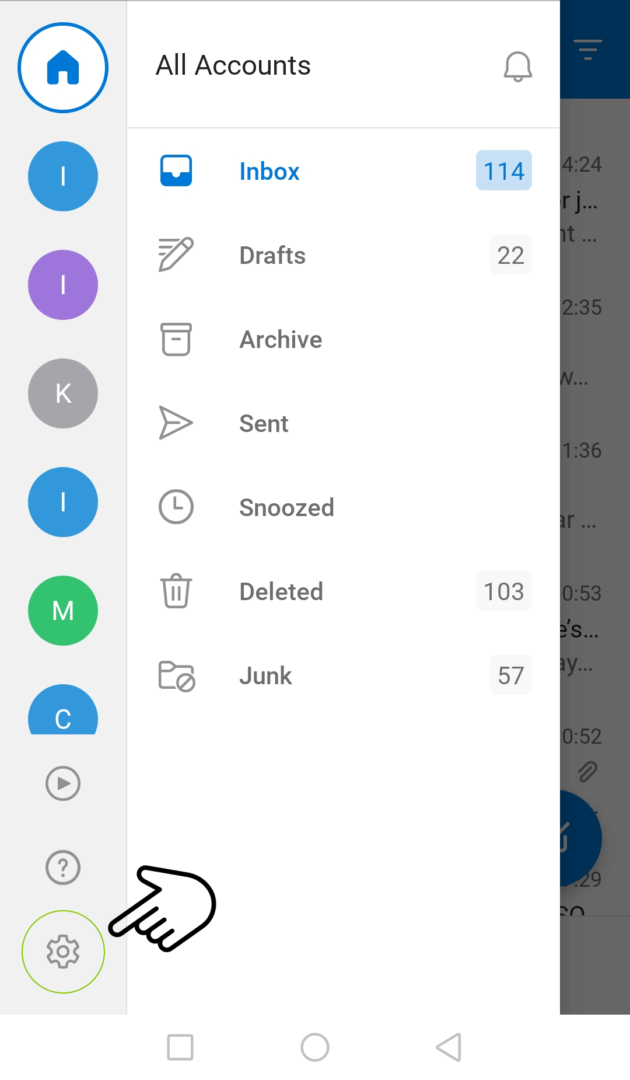
1. Start by opening your Outlook app and navigating to your dashboard. Click on the settings icon on the lower left side of your screen.
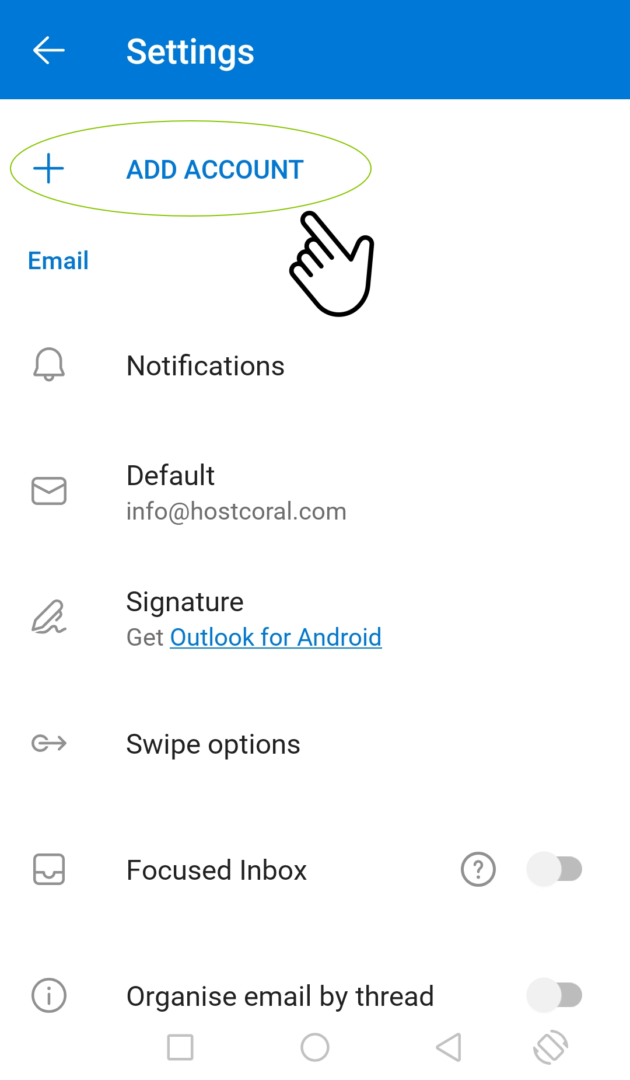
2. Click on the “add account” button to get started adding your account.
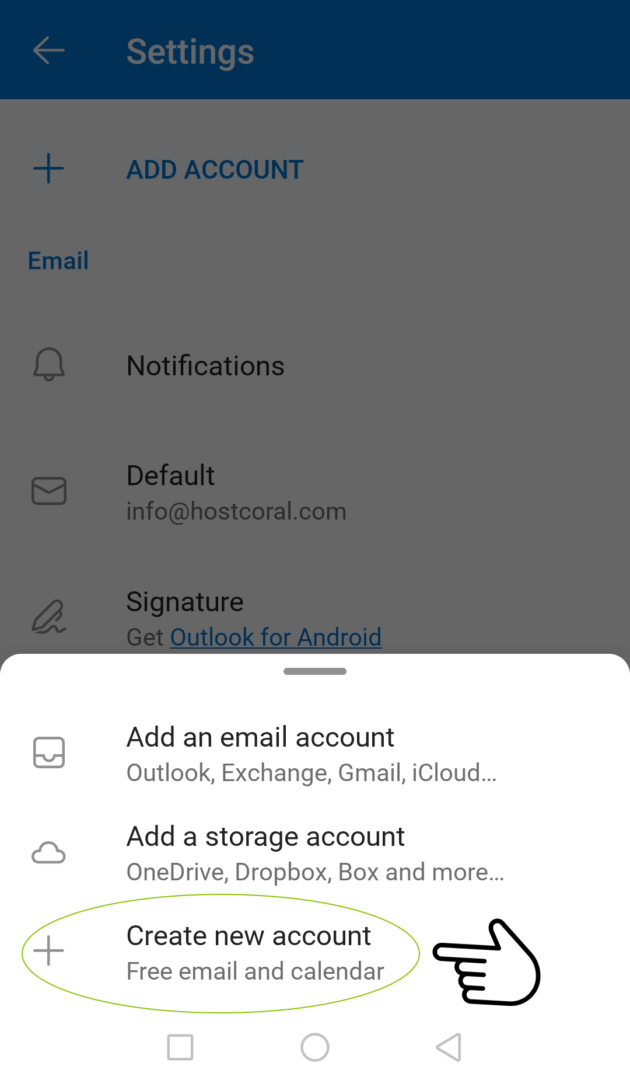
3. Select “Create new account” from the add account prompt.
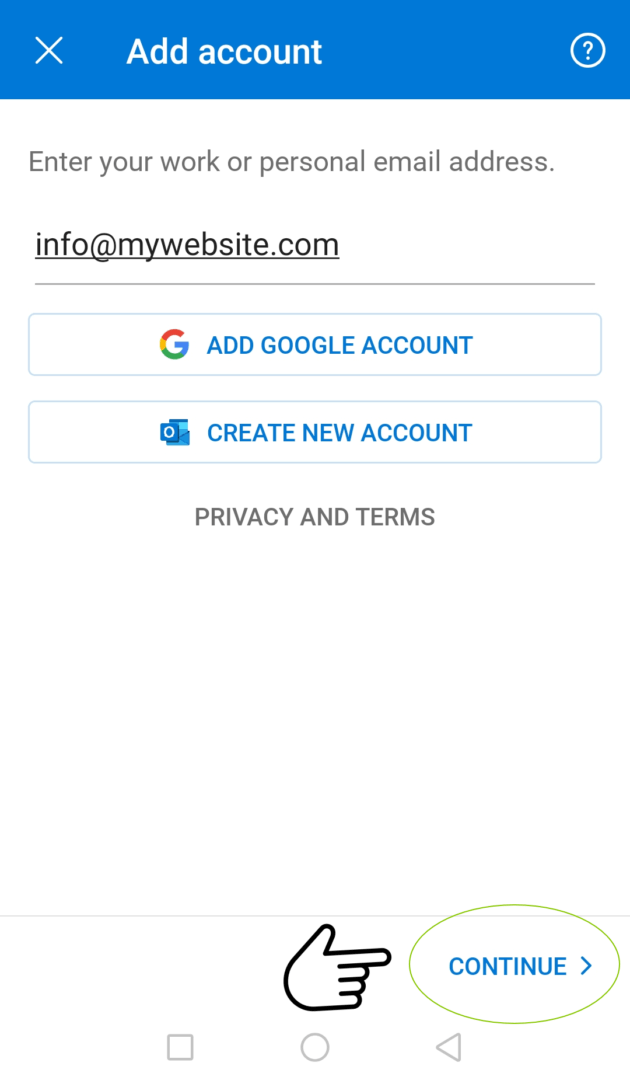
4. Type the email address you are trying to add and click on continue. In the example, the account used is “info@mywebsite.com” for the “mywebsite.com” domain name.
Remember to replace the “mywebsite.com” with your actual domain name. “mywebsite.com” is only used for example purposes.
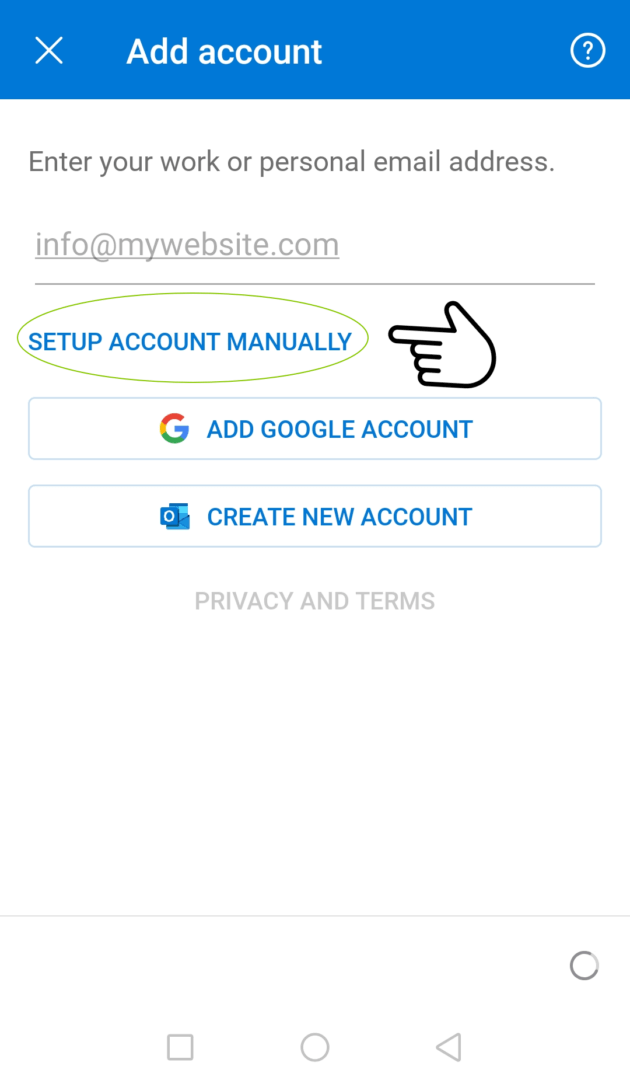
5. After a few seconds, the “Setup account manually” option should appear. Click on “Setup account manually”.
Remember to replace the “mywebsite.com” with your actual domain name. “mywebsite.com” is only used for example purposes.
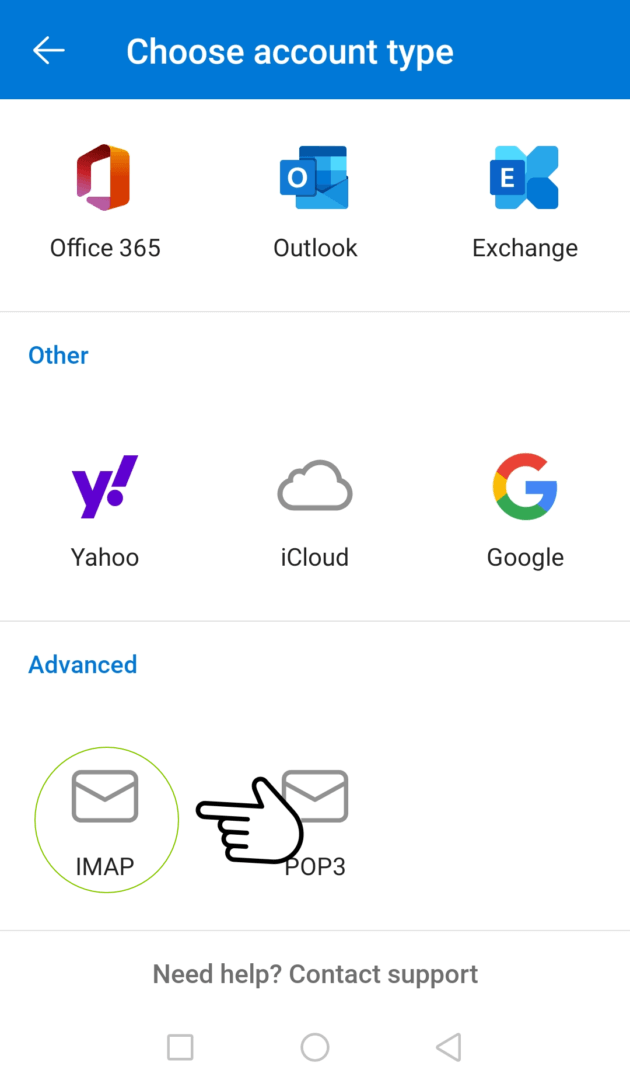
6. From the Choose account type screen, select “IMAP” from available options. If IMAP is not available, please contact your android app support. POP3 is also possible but not recommended because it limits syncing across multiple devices.
Remember to replace the “mywebsite.com” with your actual domain name. “mywebsite.com” is only used for example purposes.
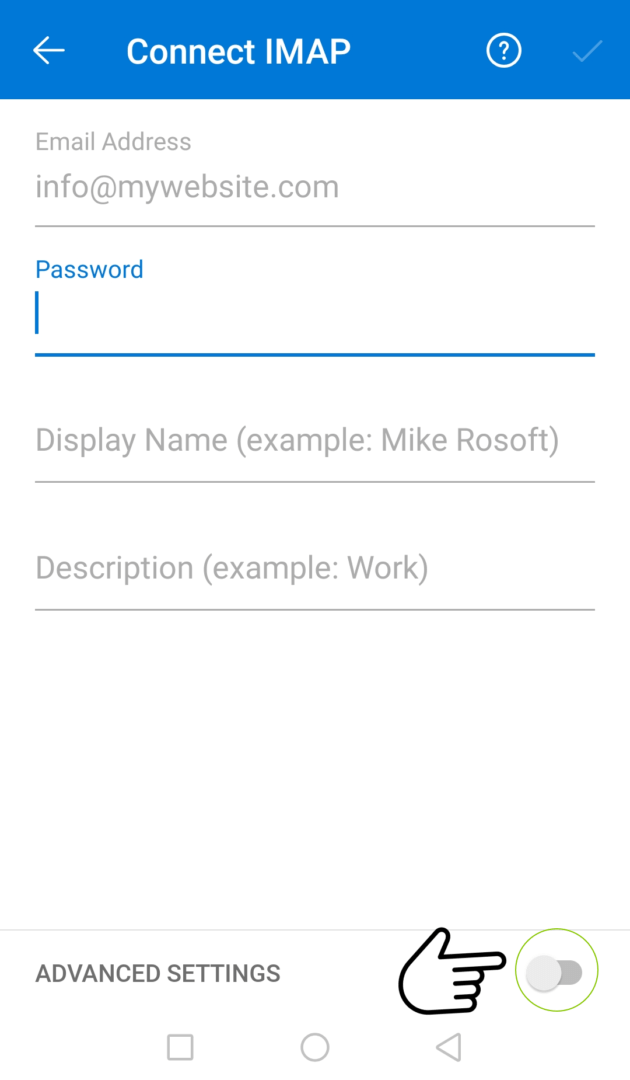
7. Make sure the “Advanced settings” option is turned on before proceeding or adding any data.
Remember to replace the “mywebsite.com” with your actual domain name. “mywebsite.com” is only used for example purposes.
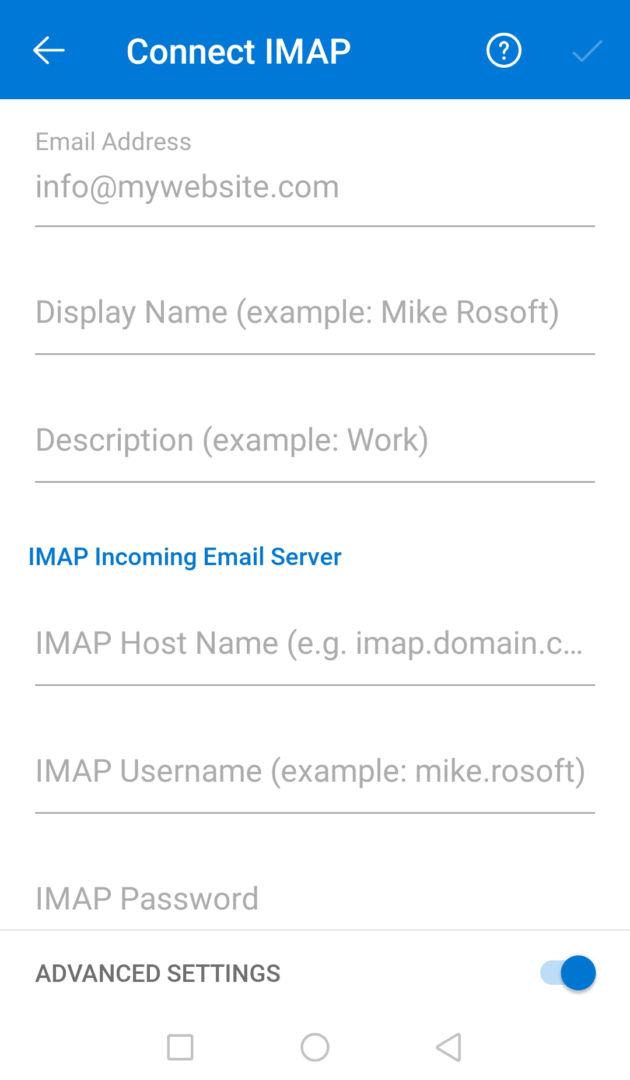
8. If “Advanced settings” option is turned on, a few extra required fields should appear.
Remember to replace the “mywebsite.com” with your actual domain name. “mywebsite.com” is only used for example purposes.
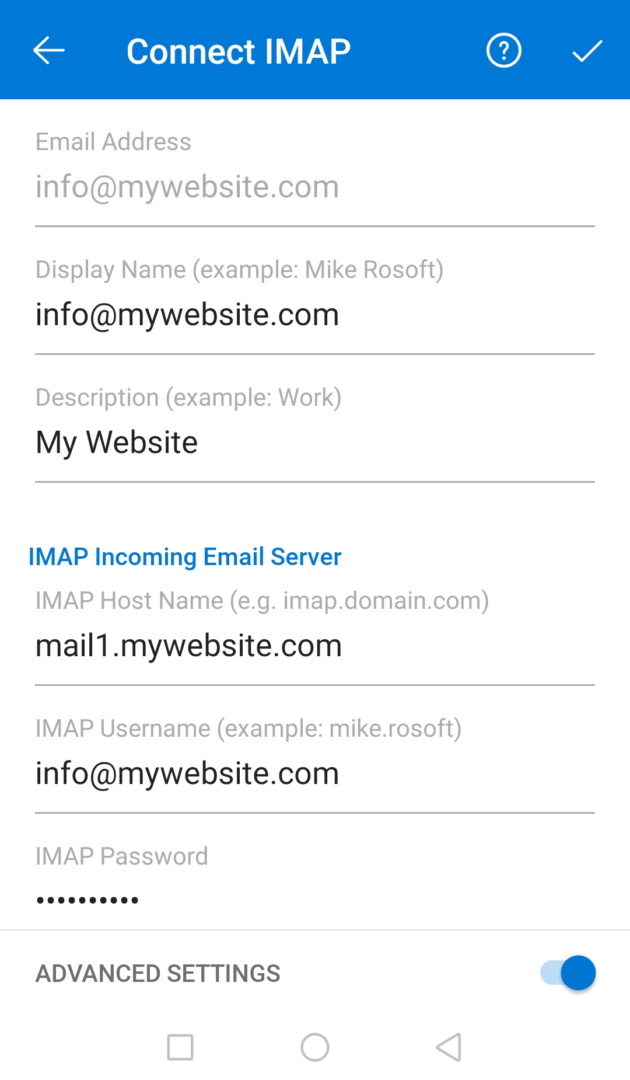
9. Enter the display name and description for the selected email to de shown in your outlook inbox.
Remember to replace the “mywebsite.com” with your actual domain name. “mywebsite.com” is only used for example purposes.

10a. Enter your IMAP information that you received via e-mail. If you have not yet received your IMAP settings for your mailbox, contact us here. If you created your own mailbox via our guide; how to create a new email for my website , then you should already have the needed password information.
Use the following information :
| IMAP Host Name | imap.hostcoral.com * For secure mail you need to use port 993 default port 143 |
| IMAP Username | info@mywebsite.com
in this example we use mailbox “info”. Use respectively. |
| IMAP Password | mailboxpassword
Can be found in your account information file or setup via your panel. |
Remember to replace the “mywebsite.com” with your actual domain name. “mywebsite.com” is only used for example purposes.
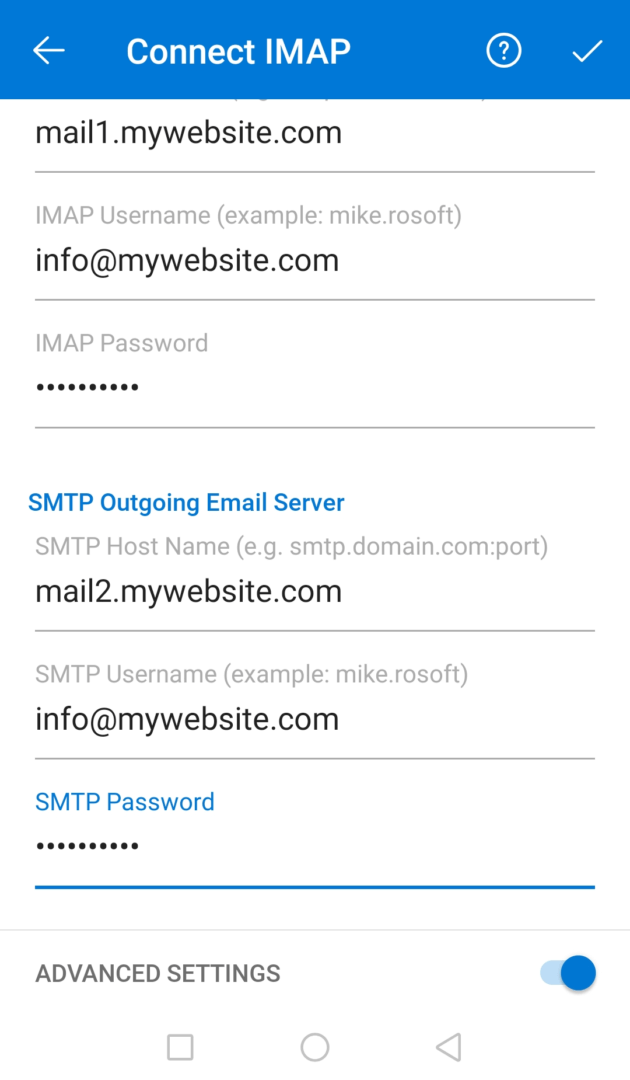
10b. Enter your SMTP information that you received via e-mail. If you have not yet received your SMTP settings for your mailbox, contact us here. If you created your own mailbox via our guide; how to create a new email for my website , then you should already have the needed password information.
Use the following information :
| SMTP Host Name | smtp.hostcoral.com default port 587 |
| SMTP Username | info@mywebsite.com
in this example we use mailbox “info”. Use respectively. |
| SMTP Password | mailboxpassword
Can be found in your account information file or setup via your panel. |
Remember to replace the “mywebsite.com” with your actual domain name. “mywebsite.com” is only used for example purposes.
After setup, if you are prompted to accept any SSL settings/certificates, please confirm and accept or the account will not make the necessary connection to the mail server.
If no emails show up : Click on the refresh button or perform an android window refresh by dragging the screen downward, similar to a browser page refresh.
For PC
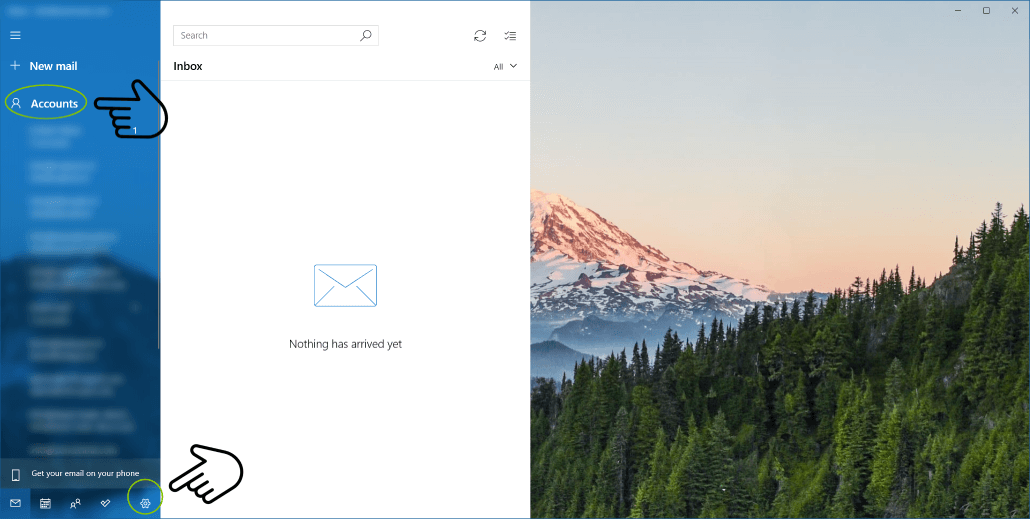
1. Start by opening your Outlook app and navigating to your dashboard. Click on the account icon on your dashboard or settings icon on the lower left side of your dashboard screen.
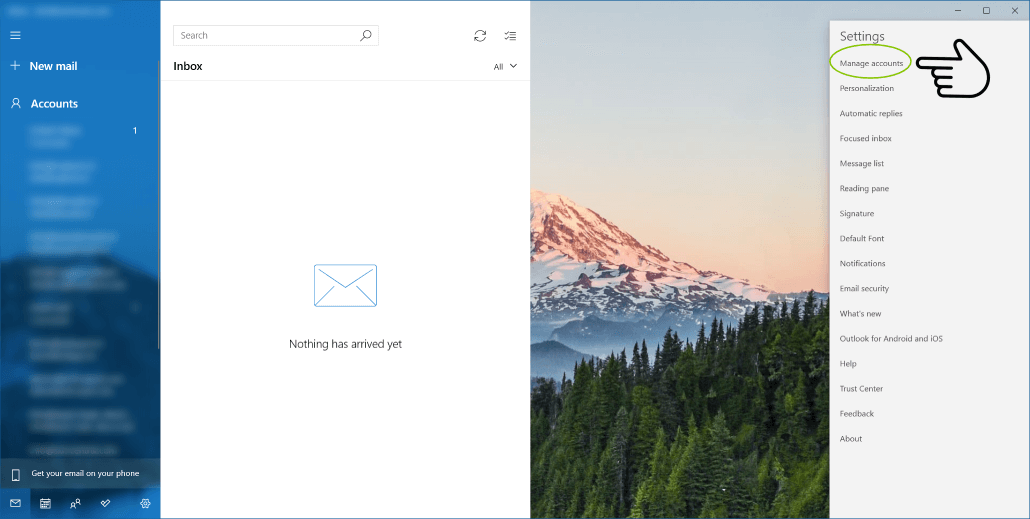
2. Click on the “Manage accounts” button to get started adding your account.
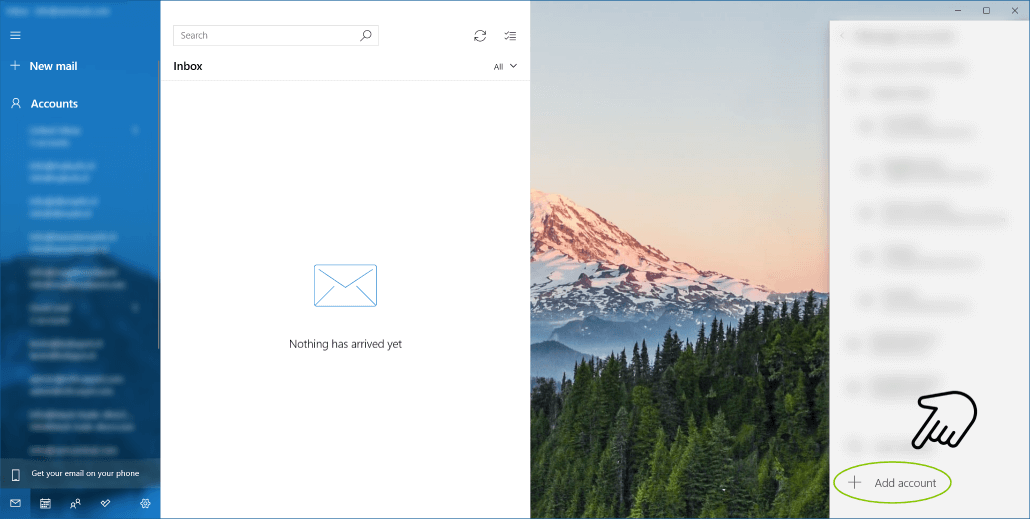
3. Click on the “Add account” button
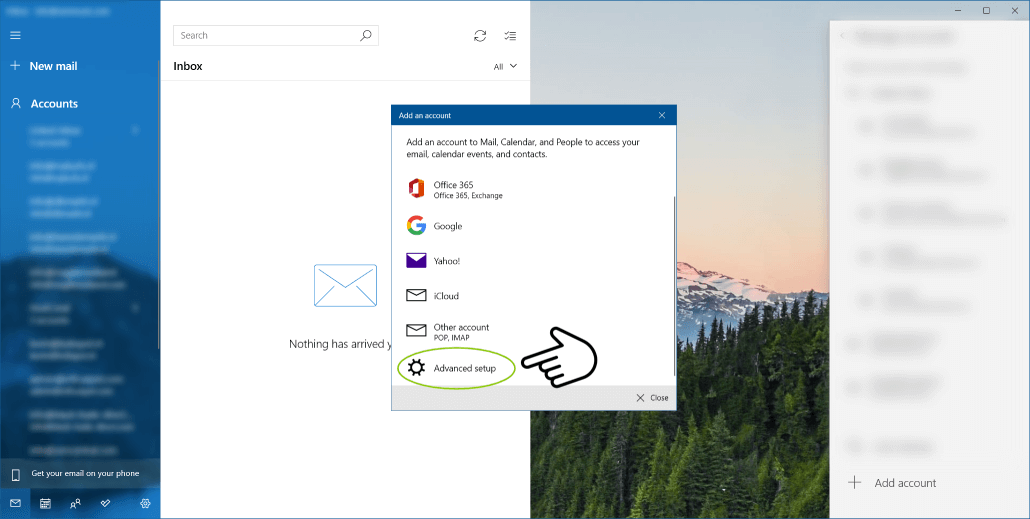
4. Click on the “Advanced setup” button (with the gear icon)
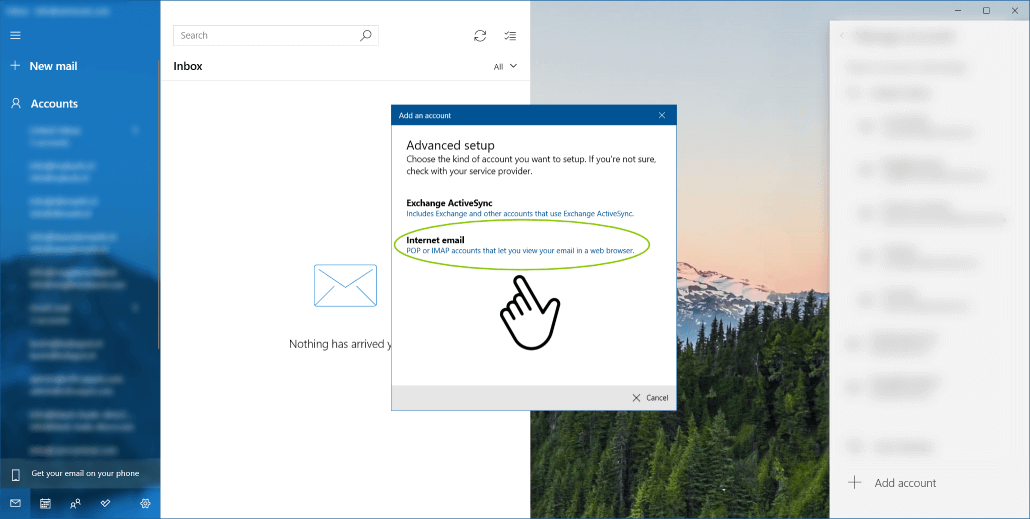
5. Click on the “Internet email” section to proceed to the internet email setup
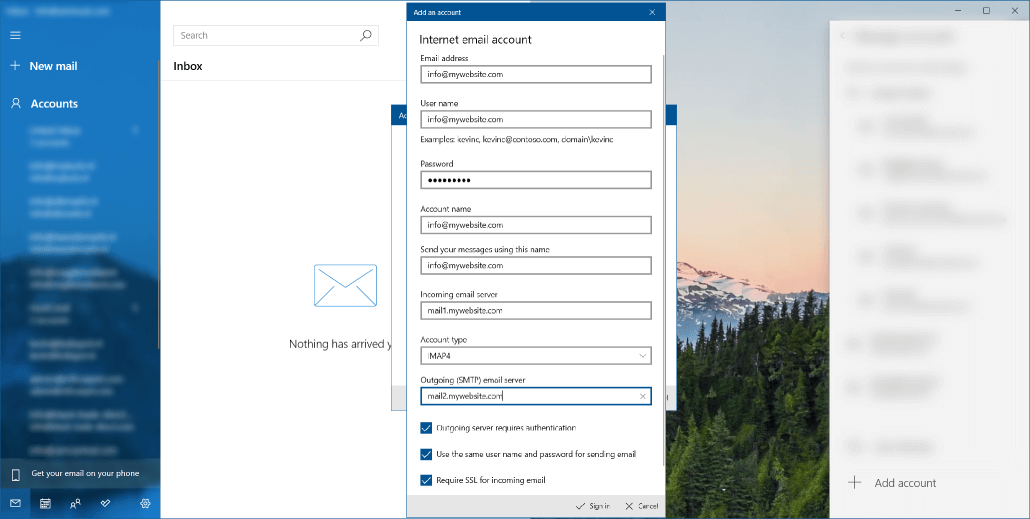
6. Email setting
| Email address | info@mywebsite.com
the respective email address you are connecting |
| User name | info@mywebsite.com
the respective email address you are connecting |
| Password | mailboxpassword
Can be found in your account information file or setup via your panel |
| Account Name | info@mywebsite.com or other
you may use any account name but we do recommend your mail address, for example; info@mywebsite.com |
| Send your messages using this name | info@mywebsite.com or other
here you can set the name of your mail header name |
| Incoming email server | by default : imap.hostcoral.com
default port 143 |
| Account type | IMAP4
we recommend IMAP4 but POP3 is available |
| Outgoing (SMTP) email server | smtp.hostcoral.com
default port : 587 |
After setup, if you are prompted to accept any SSL settings/certificates, please confirm and accept or the account will not make the necessary connection to the mail server.
If no emails show up : Click on the refresh button or perform an android window refresh by dragging the screen downward, similar to a browser page refresh.