The blow guide will help you setup your new CMS website.
If you experience any issues while setting up your website, contact us here to help solve them.
How to install WordPress & other CMS systems
- Make sure you have already added your website. To add / create a new website, follow step 1 to 4 of our My Websites Guide.
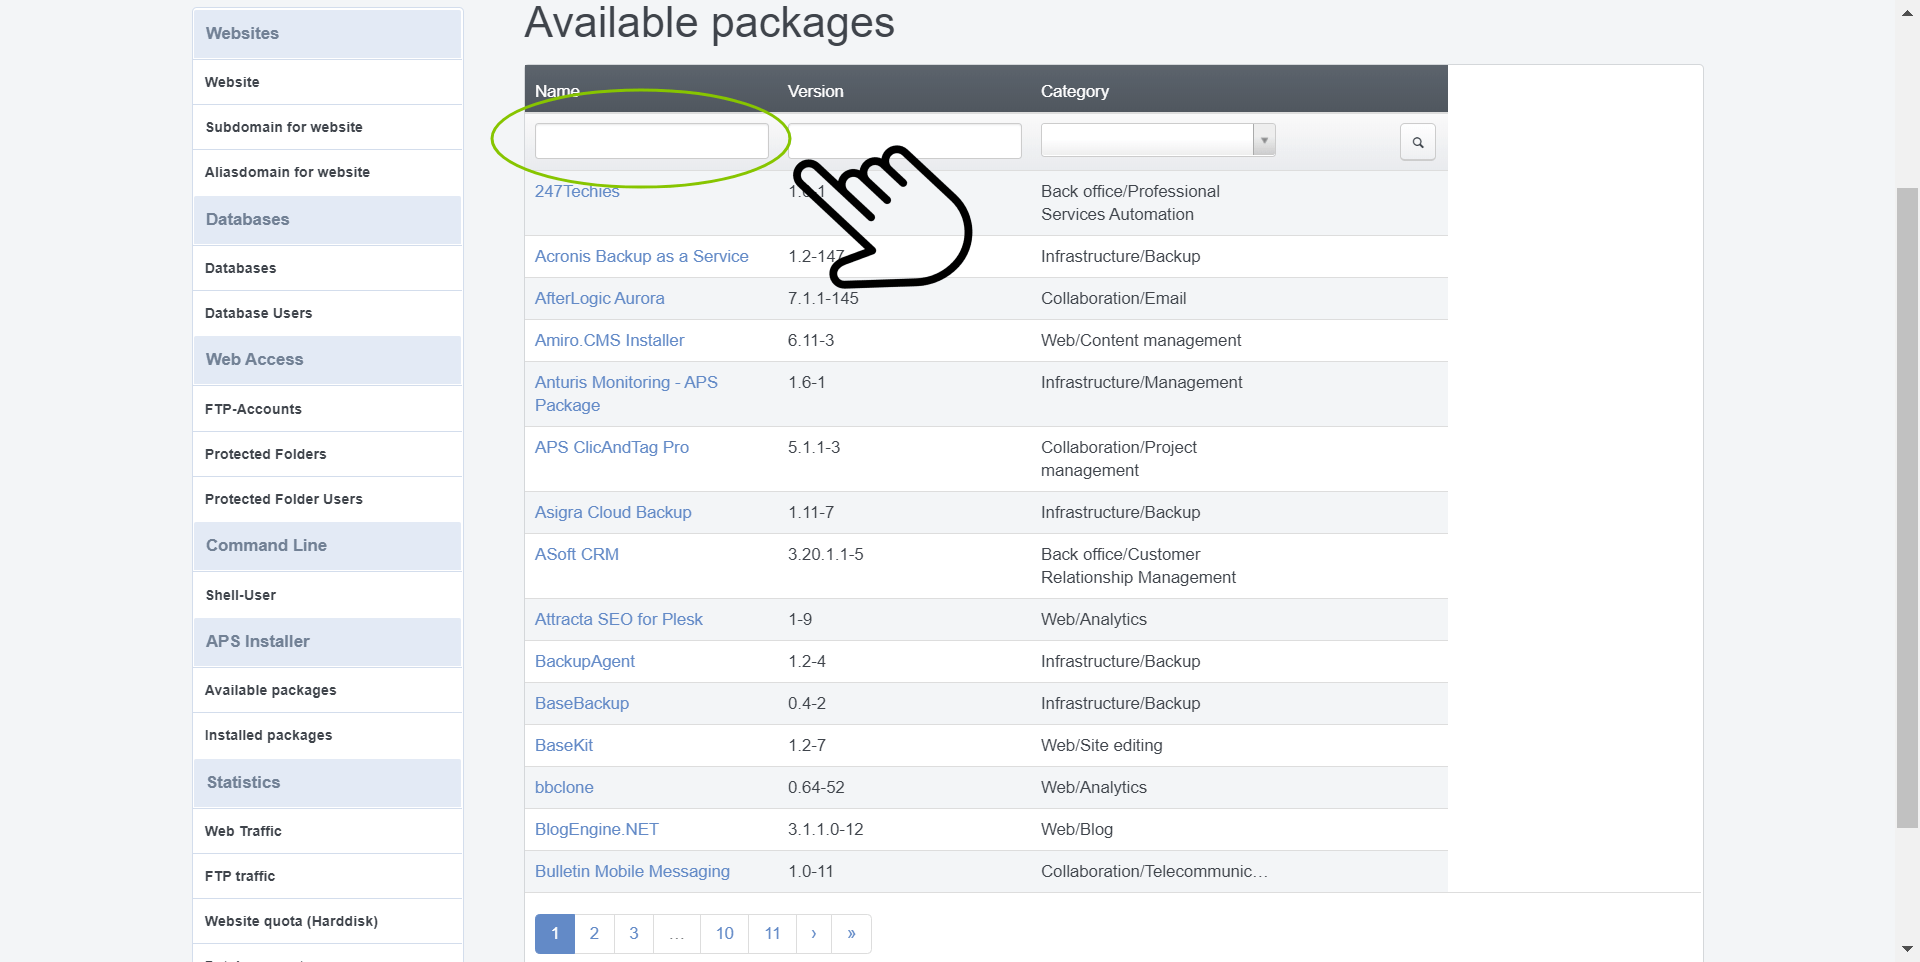
2. Available Packages – Find your desired CMS by typing it’s name in the upper field “Name”. If your desired CMS is not available; please check your spelling and other active filters. If it’s still unavailable, then unfortunately; your CMS is not supported in the 1-click install. Try contacting the support section of the CMS.
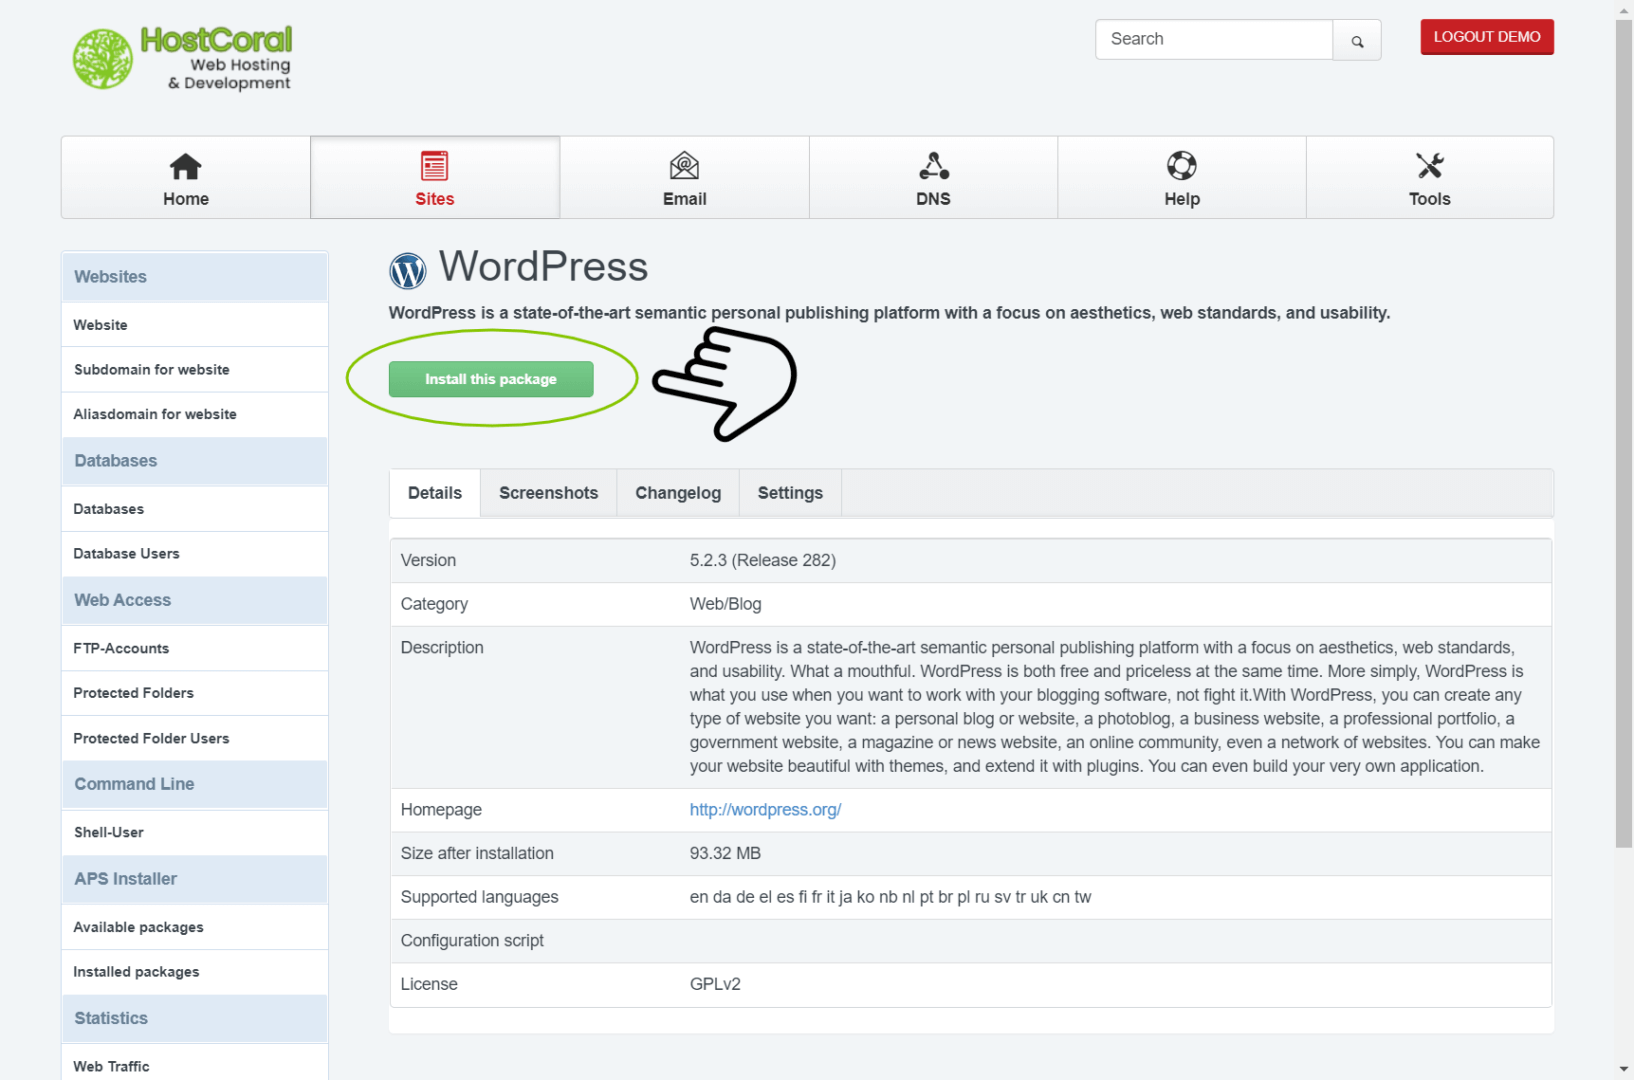
3. CMS Details – After you have clicked on the desired CMS, you should then see the details screen. At the details screen you will find information regarding the selected CMS.
If you are sure you have the correct system, click on the “install this package” button.
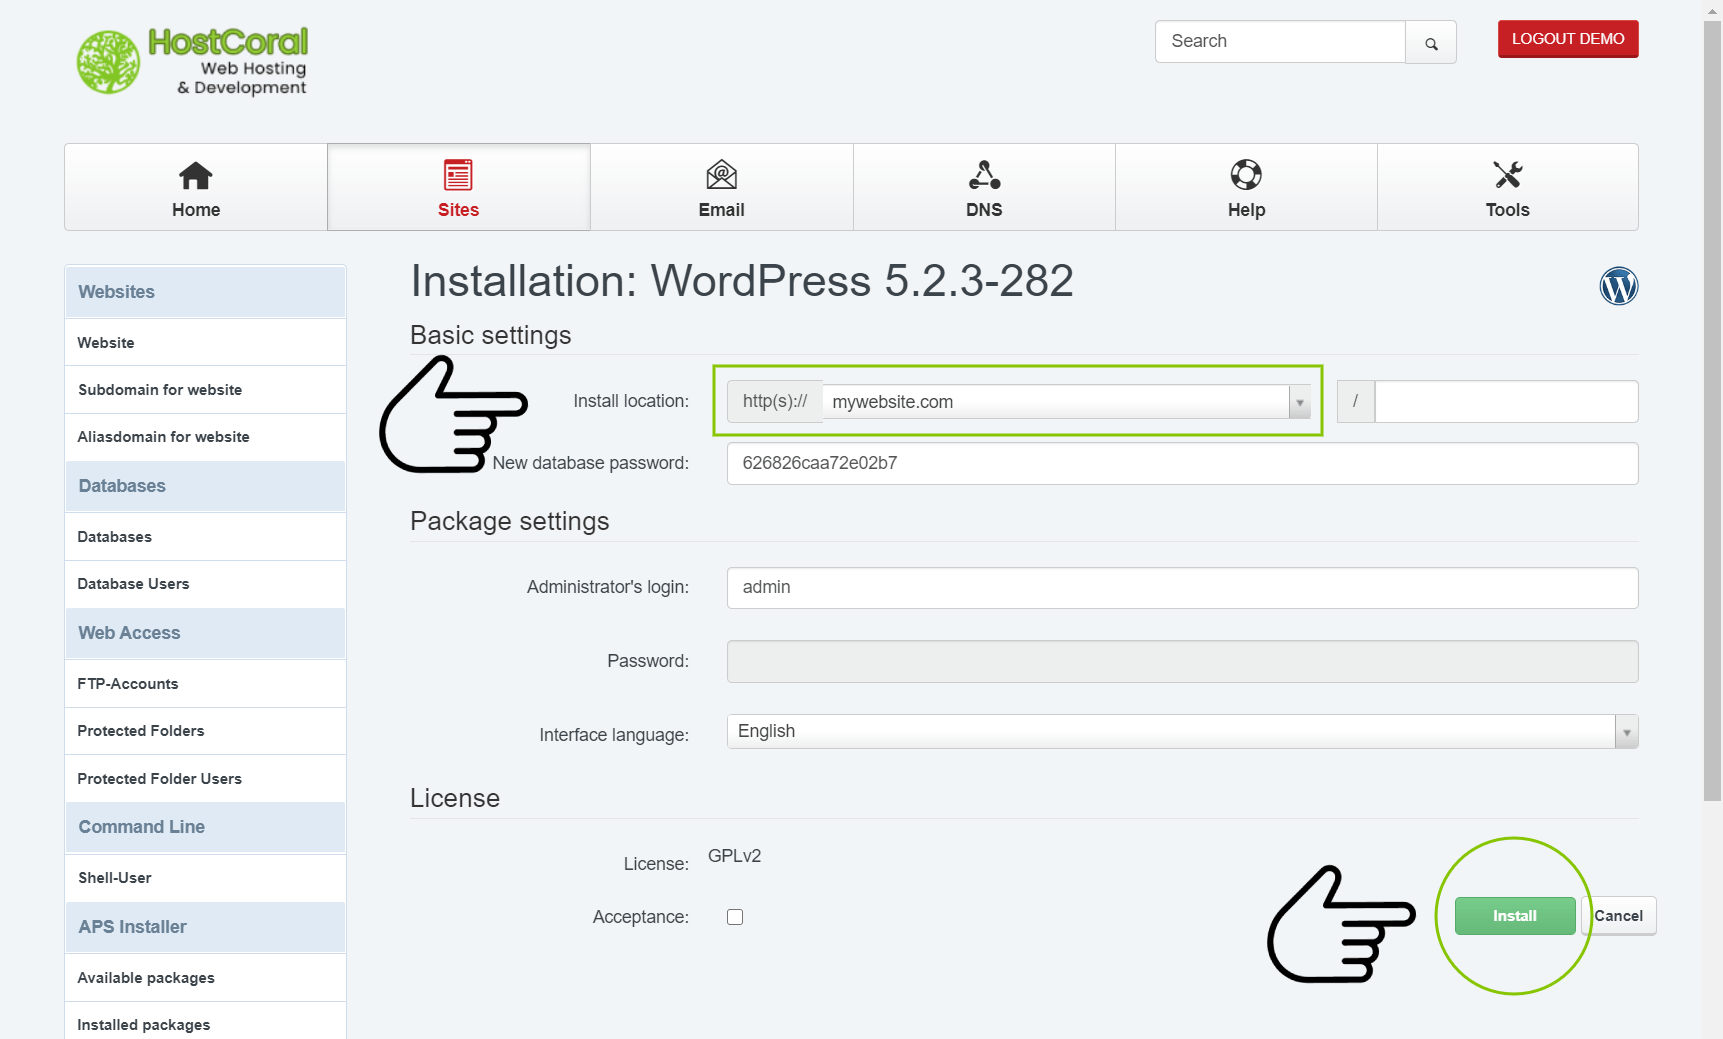
4a. Installation
Basic Settings
- Install location – Pay Attention! Make sure you have selected the correct website. Any website data from the selected domain will be deleted permanently.
- New database password – We recommend you store this information in a safe place, your CMS might require this information in the future
Package settings
- Make sure all fields have been filled in properly. We recommend you take note of all the information you fill in into each field.
Install
- If you are certain you have selected the correct domain and all fields are properly filled in, click on the “install” button.
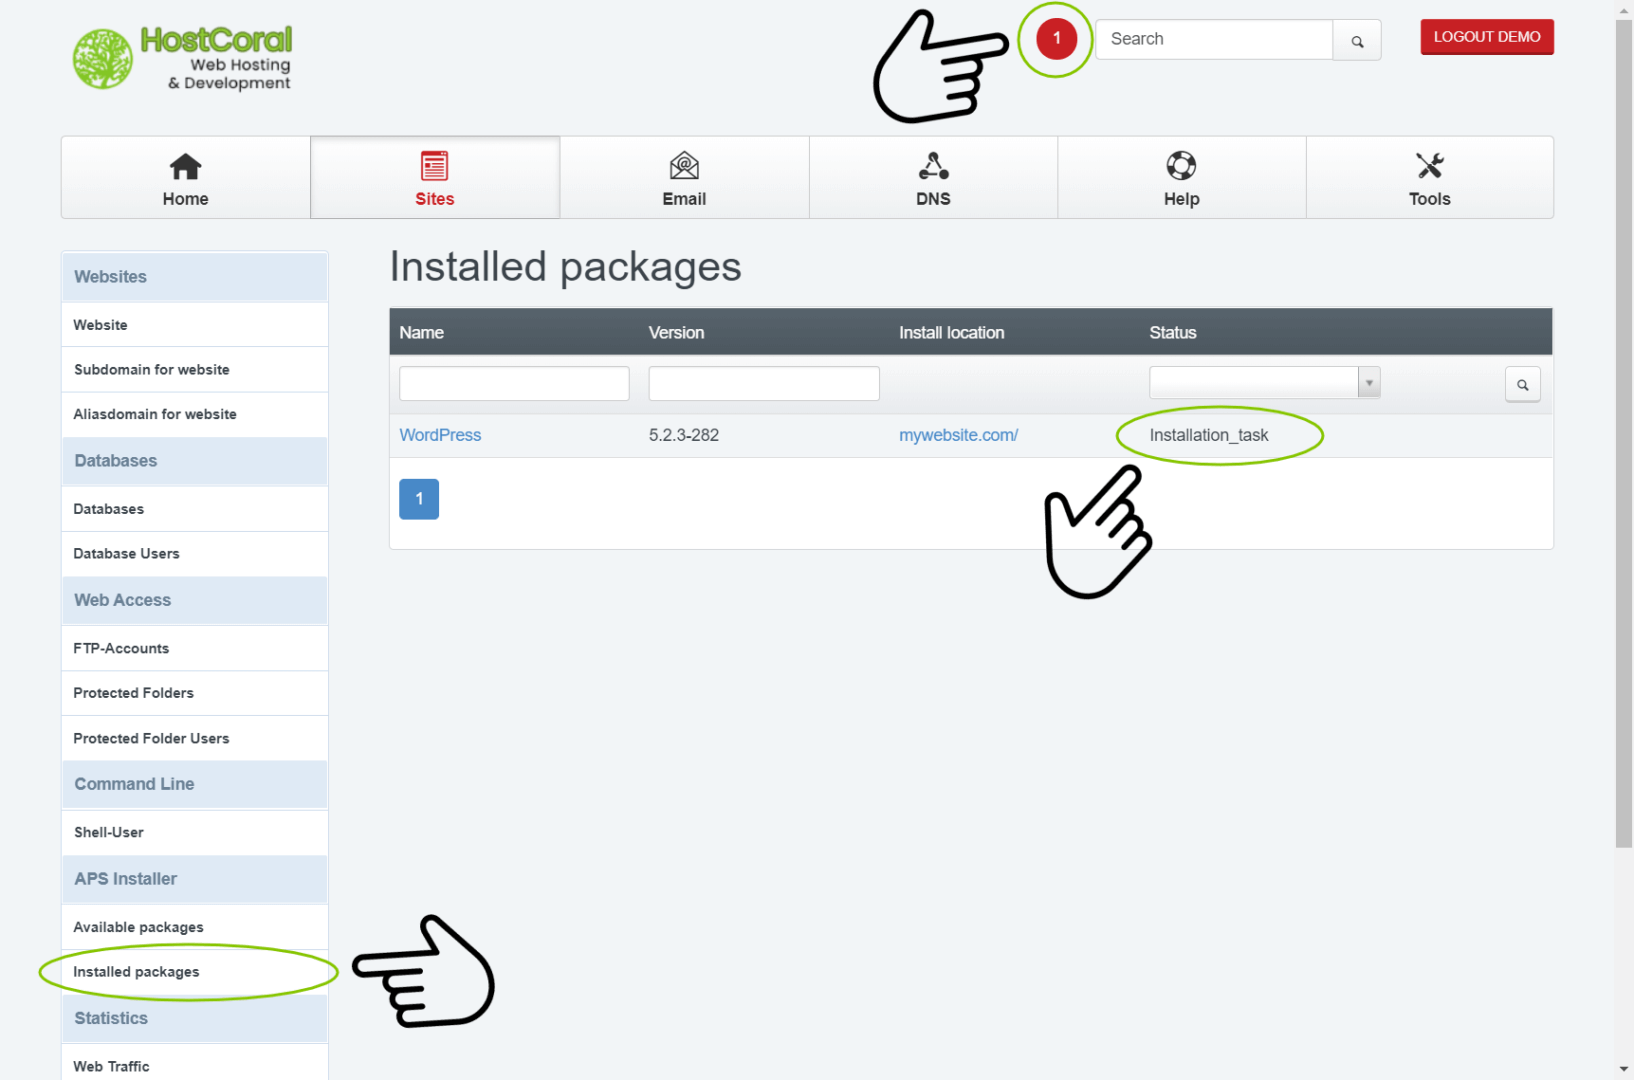
4b. Installation Task
- After clicking the “install” button the installation should automatically start. If you are asked to confirm any options, please confirm to proceed.
- If you do not see the installation task page, click “Installed packages” on the left sidebar under the “APS installer” section.
- You should see the installation process data. The status of the installation should be “installation_task”. The “installation_task” status means that the install is still in progress. At the stop of the screen you will also see a red notification bubble, indicating that a background process is running.
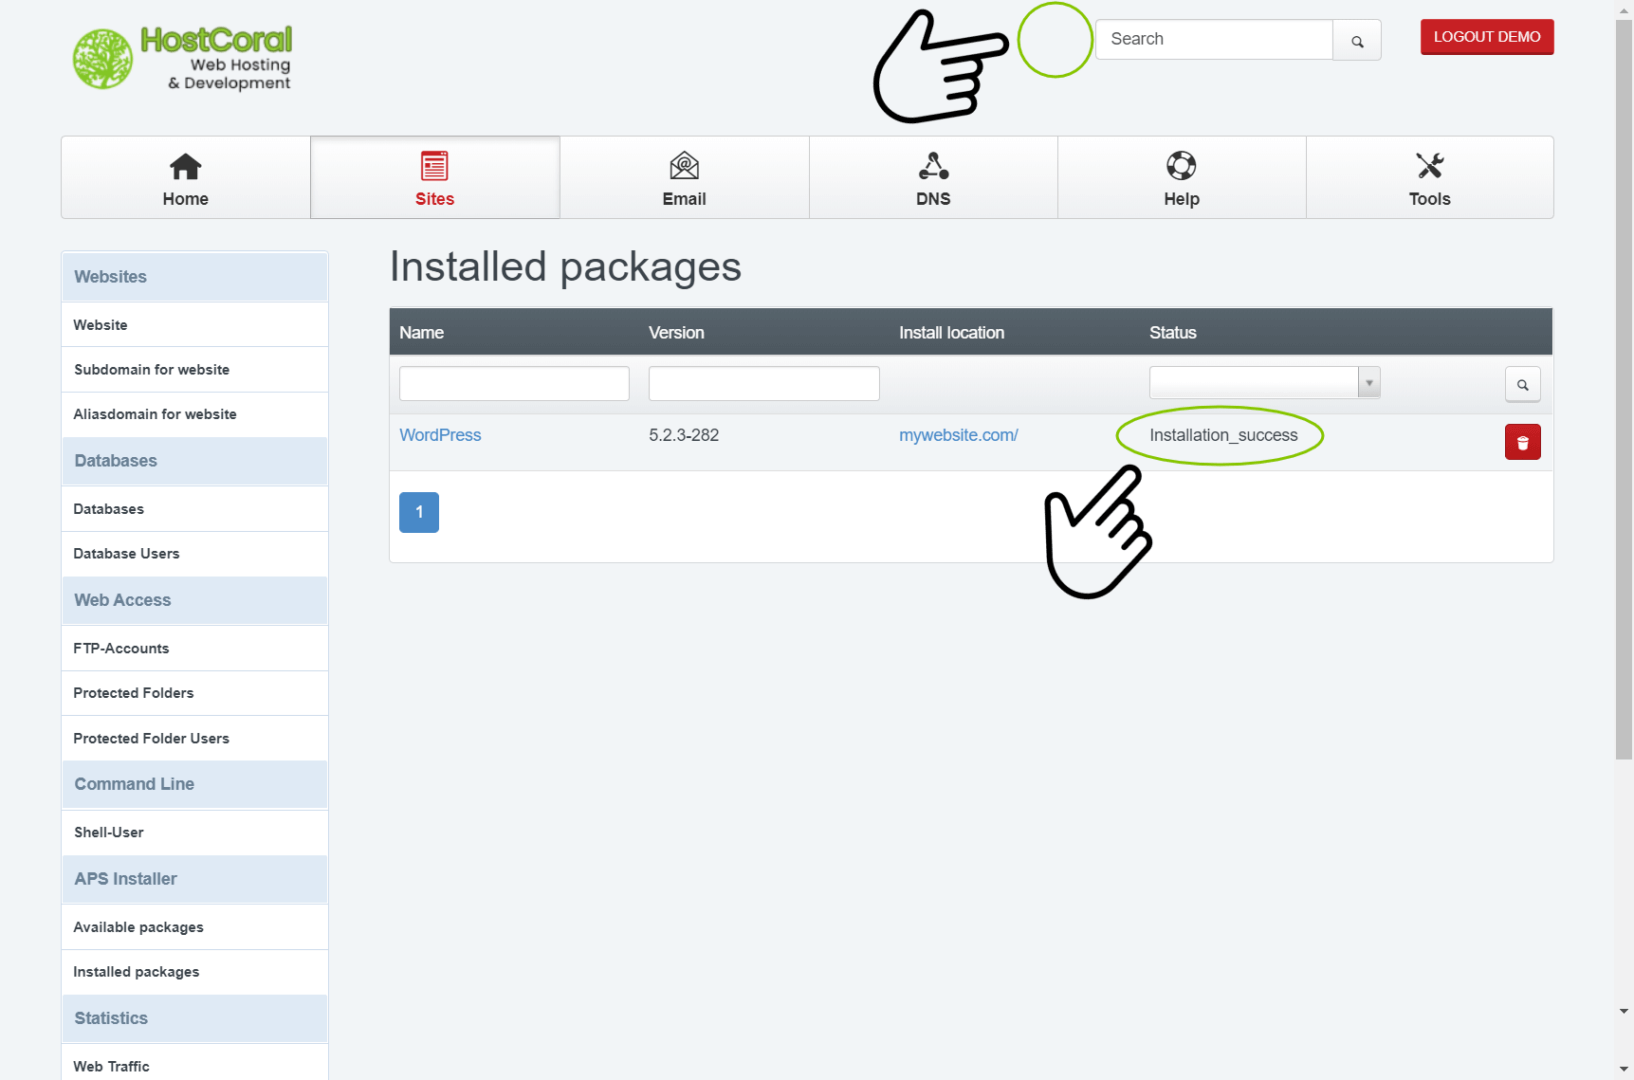
4c. Installation Task
- After the installation is successful; the notification bubble should disappear and the status should change to “installation_success”. If the status has not changed after 10 mins, repeat the above steps or contact us here to assist you.